Sunday, October 5, 2014

Weather-sealing weird old-fashioned casement windows

I'm a tree hugger of the practical, utilitarian variety.  I like to conserve energy, and by far the biggest energy sucker in my house is the windows.  I've finally done something about it.  This post is all about how to weather-seal weird old-fashioned casement windows.

A view out my living room window
There are a lot of different kinds of windows!  Double-hung sash windows (with a top and bottom part which can be slid up and down within the frame) are common in the US.  My kitchen and bathroom have double-hung sash windows which I'll write about another time.  The two ad-ons on the back of my house have newer (rather shoddy) sideways sliding horizontal sash windows, and the kitchen has two newer tall fixed windows that go into the laundry room (kind of odd).  However, the vast majority of my house's windows, however, are inward-swinging casement windows.  They're quite elegant and reasonably easy to open and shut.  The main disadvantage is that if you plan to open them often (which I do), you can't place any furniture within a few feet of the windows, which makes furniture placement rather awkward.
Elegant craftsman-style casement windows on the front of the house. Copyright 2013 by Andrew Morang
Gaps along the sides of my windows
Because they're nearly 100 years old, my windows have had plenty of time to settle and be rejiggered during earthquakes.  They've also been painted at least 8 times.  Consequently, the gaps around the windows are uneven, very tight in some places, and very large in others.  This makes weather sealing difficult.

Some weather stripping and sealing products are designed to fit inside the gap and cracks.  This class of products wouldn't work well on my windows because of the unevenness of the gaps.  Someone in the past tried to put stick-on foam weather stripping on one of the living room windows, but by the time I bought the house, it was a sticky, oozy, squishy mess that actually prevented the window from shutting and latching all the way.  Additionally, most of the stick-on foam or vinyl products I found tend to be short-term solutions that have to be replaced often.  Finally, because the windows swing inward, they rub the frames sideways, and if you put weather stripping on the sides of the frame, the window will rub it sideways and tear it off rather than gently compressing it the way it's supposed to.
Compressible bulb weather seal.
Diagram from the McMaster-Carr catalog

In short, I had to start thinking about my windows like doors.  Enter the compressible bulb seal!  The diagram below from the McMaster-Carr catalog illustrates how it works.  When the window shuts, it hits the rubber bulb and gently compresses it, forming a nice seal outside the crack, even when the window surface is a bit uneven.  The bulb seals the crack from the outside, without having to fit in between the frame and the window.

I looked into a few different options for compressible bulb seal weather stripping.  I first tried some cheap stuff from Home Depot that had to be nailed, stapled, or glued on.  Nails didn't work at all because the stuff bunched up and left gaps.  I tried glue, but it was too hard to get it to set in the right place for a good seal.  Plus, glue means it sticks to the paint and not the actual window frame, and it comes off as soon as the paint starts chipping.

Finally, I decided to go with the product pictured above from industrial parts supplier McMaster-Carr (Frame-Mount Weatherstripping, Black Silicone Compressible-Bulb Seal, product number 1114A3, in case you want to buy some).  At $2/foot, it was a lot more expensive than most of the weather sealing products out there, but I decided it was worth it.  You get what you pay for.  The seal comes in a nice aluminum flange that you can screw into the window frames.  The flange compresses the edge of the bulb seal to the frame of the window, so air can't get around the fixed side of the bulb.  Also, because they're screw-mounted, they're easy to take off and put back on if you want to refinish your windows (something I know I'll have to do in a few years, which will be an ordeal because they have lead paint on them).  The catalog claims the silicone bulb is heat and UV resistant, which is important in this harsh climate.  And, if it starts to go bad, McMaster-Carr sells replacement seals.

Unfortunately, because it's designed mainly for doors, the stuff is sold in lengths that weren't optimal for my windows, so I had to buy extra and cut it down, which further added to the cost. Also, while I really like McMaster-Carr's catalog and customer service, their shipping is exorbitant.  I called to get a shipping estimate, and they said $15, so I decided it wasn't worth the hour drive to pick it up at the warehouse in LA.  However, they shipped it to me in three packages, each of which was $15.  Sheesh!  Note to self: always pick up McMaster-Carr orders at the warehouse in person.

I cut the aluminum flanges to the correct lengths using my handy little jigsaw, a tiring procedure which used up three saw blades and made my hand and arm very tired.  After that, I installed it in the window frames.  It took me about 45 minutes per window.  As of this writing, I've done 7 windows and the front door, and I have 6 more windows to go.  I'm just waiting for cooler weather.  I have discovered that I'm very bad at using a drill with my left hand.  I sheered off one of my drill bits while trying to drill a pilot hole.  It will probably remain stuck in the window frame forever, fodder for some future house archaeologist's blog posts.

Old sticky oozy squishy gluey painted-over weather stripping
Speaking of house archaeology and sticky, oozy, squishy messes, I have one window that's pretty well stuck shut.  To get it open, you have to yank a little from the inside and then bang on it from the outside.  Upon examining it more closely, I realized that it is actually already weather-sealed with and compressible bulb seal that was subsequently painted over very thoroughly.  In fact, this is why the windows ticks.  When the previous owner painted, she first painted over the weather stripping.  Then, when she painted the window itself, she didn't wait long enough for the paint to dry before closing it, and the rubbery weather sealing bulb and the latex paint all got glued together.  I can't wait to try to get that off.  I'm saving that window for last.

Public service announcement: Don't paint over your weather seal.  Or your window hardware.  Or your outlet covers, doorknobs, or anything else.  Screwdrivers and painter's tape are your friends.

In case you're attempting a project like this yourself, here's the technique I came up with for actually installing the weather stripping:
  1. With the windows closed, approach the window from the outside and place the top piece where you want it, mark the center hole, and trace the edge.  You don't need to compress the bulb too tightly, but it should be snug against the surface of the window.
  2. Line up the side pieces and trace the edges, but don’t mark any holes yet
  3. Go back inside.  Drill the center pilot hole for the top piece using the mark you made and then place the weather strip and screw it in loosely.
  4. Now that the top piece is in place, you can line it up just right and drill the pilot holes for the other holes in the flange, and screw it in.  Sometimes you have to hang onto it pretty tight to avoid slippage when the screw heads hit the flange.
  5. With the top in place, line up each side piece and mark the location of the top-most hole.  Take them down and drill the pilot holes for the top holes, and then screw them in using the top hole only, leaving them a bit loose.
  6. Now that the side strips are hanging loosely in the frames, drill the rest of the pilot holes, and then add the screws, making sure the strip remains aligned where you marked it.
  7. Try opening and shutting the window.  Make sure it’s not too tight to shut, and go outside and look to make sure you haven’t left a large gap anywhere.  It’s quite adjustable, and you will probably have to adjust it. You can loosen one or two screws at a time and rejigger it as necessary.
  8. If you're doing a piece along the bottom, do that now.  I couldn't do the bottoms of my windows because the geometry is different.  That's a project for another day.

Saturday, September 20, 2014

Stridulatorio: A non-staged operatic work performed by crickets

A cool breeze floats through my open windows, and the last remnants of the day's sunlight are just visible as I sit down in my living room to enjoy some peaceful reading.  Chirping crickets outside make a gentle drone.  Then, suddenly, a violent, ear-piercing stridulation disrupts my peaceful evening.  Crickets are LOUD when they're in your house.  Yes, in the house.  I seem to have a cricket problem.

"Stridulation" is the technical term for cricket chirping.  The term describes a sound produced by rubbing body parts together.  In the case of crickets, it's by rubbing their wings together.  Male crickets stridulate in order to attract females and scare away other males.  They stridulate during mating, and after mating.  Basically, they stridulate all the time.

An oratorio is a piece of music featuring operatic singing and a chorus but, unlike an opera, performed without staging.  You're probably familiar with Handel's Messiah, which is an oratorio.  It's about two-and-a-half hours long and alternates between the orchestra, the chorus, and recitatives by the soloists.  Oratorios were often performed during Lent when normal theatrical productions were prohibited, and they tend to be religious in subject matter rather than about mythology or romance like operas.

Watch a few minutes of Handel's Messiah, and then imagine the choir as a bunch of stridulating crickets.  Now imagine that they're singing about their girlfriends instead of Jesus.  Imagine that they do this every night, all night.  What do you get?  A stridulatorio!

My house was full of crickets last fall and winter.  I think they liked it because it was warm inside.  They always seemed to be in the laundry room, hanging out under the hot water heater.  They would be stridulating with gusto, but as soon as I approached, they would all go silent.  As a friend of mine remarked, "It's like when you're singing in the shower and you hear your roommate come into the house, so you stop."   I can just picture the guilty-faced little buggers pretending like nothing had happened.  "Singing?  What singing?  I have no idea what you're talking about.  I wasn't singing. <smirk, smirk, I was stridulating The Messiah, except it was about my girlfriend>".

Although the choir of this cricket stridulatorio sings in the yard, often one of the soloists would venture out into the kitchen.  Whenever I saw one, I would scoop it up in a can I kept on the countertop for this purpose and throw it outside.  I felt bad smooshing them because they're harmless.  But I can't say I'm too sympathetic.  One evening, while I was talking to my aunt and uncle on the phone, I watched a spider snare a cricket in its web in the corner of the kitchen and proceed to disembowel it.  It was actually pretty cool.  Another time, I came home from work to find that a cricket had been disemboweled on my bed.  There were legs everywhere and a spot of cricket gut juice on the sheet.

I've been sealing up cracks and holes in the house ever since I moved in, both in the interest of energy efficiency and also in an attempt to keep the crickets out.  After I noticed crickets lurking around the fireplace in my living room, I discovered a large gap between the river rock facade and the bottom side of the mantle piece.  I filled that up with my dad's favorite expanding foam and touched up the remaining holes with caulk.  It expanded a little out of control, so I had to cut it back down with a utility knife.  It still looks a bit odd, but you can't see it unless you're sitting down or you're really short.  Nevertheless, despite sealing up all the cracks, there are still crickets in my house, stridulating their little hearts out...


Sunday, August 3, 2014

Ding-Dong, the Tree of Heaven is dead!

Did you know that you can treat mental illness with a mixture made from the roots of a Tree of Heaven, douchi (fermented and salted soybean), and young boy's urine?  At least, that's what somebody thought in 723 AD in China.  I wonder how they came up with that recipe.

Tree of heaven with big sapling clump in front of it
Until recently, my backyard suffered the misfortune of being home to a Tree of Heaven.  The Tree of Heaven (Ailanthus altissima) is an aggressively invasive fast-growing weed tree native to China.  They're widespread across the world these days because, unfortunately, European and American gardeners planted them in order to invoke a sense of Asian-ness whenever Chinese culture was vogue.

Trees of Heaven grow extremely quickly, generally taking over recently-disturbed areas by choking out native plants.  The roots give off chemicals in the soil that prevent other plants from growing. It can grow in a range of climatic conditions, in all types of soil (including concrete rubble), and in the presence of all sorts of noxious pollutants.  In Southern California, grows very happily in full sunlight with no water.  If you cut it or disturb it, it responds by growing back even stronger.  Female Trees of Heaven reproduce copiously by seed in addition to suckers spawned from the mother tree's roots.  Male trees produce root suckers as well, and also give off a foul odor.  Female trees don't stink, but they do smell kind of peanuty.  If you've read A Tree Grows in Brooklyn, the featured tree is a Tree of Heaven.

My backyard was being completely taken over by Tree of Heaven.  Saplings were sprouting up everywhere, and I couldn't keep them under control.  I'm still hoping to landscape my yard into a wonderland of droubt-tolerant shrubbery one day, but I could see that there was no point in even trying while the Tree of Heaven was there.  So, as much as I hate to cut down a healthy tree, I decided I had to try to eradicate it.

Free of the Tree of Heaven - for now...
How does one get rid of a Tree of Heaven, since it's so indestructible?  The US Forest Service provides a management field guide, which gave me some ideas, but I really wanted to find a local tree-cutting service that knew about Trees of Heaven specifically.  I talked to several tree services, and I was generally unimpressed by their knowledge of tree species.  I got quotes from three different services.  I ended up going with the one that was most expensive but with the proprietor who seemed to actually know something about the biology of Trees of Heaven.  In hindsight, I probably could have gone with the cheapest one, since they were all offering to do basically the same things.  However, the more expensive guy also struck me as much less sleazy than the cheap guy, who probably used unlicensed and uninsured laborers.  He also seemed like he would be really thorough, and he was.

The tree guy and his crew came out one morning, and within a few hours, the Tree of Heaven was gone completely.  They ground up the stump and all the saplings and left the yard very neat.  They did grind through one of the sprinkler pipes, but they were nice enough to tell me about it.  There are several old sprinkler systems in the backyard, none of which work, so it didn't matter.

The yard looks soooooo much better with the tree gone.  It's much cleaner and neater, and I know I made the right decision to have it removed.

Growing inside the garage
The tree guy warned me that the tree would no doubt come back, so I will have to keep on top of them and eradicate them before they get well established.  Consequently, all future saplings are on a strict Roundup diet until there are no more.  Unfortunately, there are incursions of this annoying plant in both of my nextdoor neighbors' yards, so unless those are kept under control, too, we'll continue having this problem.  In the weeks since the tree was cut, I've found a few scattered incursions, but Roundup kills them in a matter of hours.  I sort of hate to use the stuff, but in this case, I think it's warranted.  Yesterday, I found a sapling growing inside my garage out of a crack in the wall.

Maybe it's a good thing that nature can furnish such an indestructible plant species.  After we've screwed up the world due to climate change or nuclear holocaust or something, there will still be something nice and green and leafy to put things back into balance.  Won't that be a paradise!  The roaches and the Trees of Heaven, partying on after the apocalypse!

Friday, July 4, 2014

Vanity Wars

I have just [nearly] concluded a war with my bathroom vanity.

Wait a sec, what is a "vanity" anyway?  A sink built into a counter and cabinet unit in a bathroom is apparently called a vanity these days.  My family never called it this when I was growing up, but, then again, our bathroom sinks were freestanding, so maybe we never had occasion to refer to a vanity.  I generally referred to this item as the "bathroom sink countertop/cabinet thingie" until I picked up the word vanity from various home improvement store employees.

The "vanity"
According to the Oxford English Dictionary, the earliest uses of the word vanity to describe a dressing table were in the 1930s.  This use of the word no doubt derived from more conventional use of the word (placing importance on matters of one's own personal appearance and beautification).  Prior to this (and perhaps concurrently), a dressing table containing drawers and used for the application of makeup and accessories was called a "lowboy".  This went along with a "highboy", which was a taller set of drawers for storing clothes, like a dresser or bureau or chest of drawers, which are all terms describing essentially the same thing.  Just to confuse matters, the word lowboy is also a name for a semi truck trailer that is low to the ground between the two axles so you can carry taller loads.  A semi truck is also called an 18-wheeler or a big rig.  I don't know when the word vanity was first used to specifically describe the bathroom dressing table with a built-in sink.  It would not surprise me at all if this use of the word was popularized by home improvement stores' marketing departments.

As I said, though, I have just [nearly] concluded a war with my bathroom vanity.  My bathroom was completely refinished sometime fairly recently.  The shower and floor are beautifully tiled, and all the fixtures are modern.  The walls look kind of rough, as if lots of holes have been patched with varying amounts of care over the years.  But, overall, it's a very nice bathroom for such an old house.  Except for the stupid vanity.

Hole in the wall under the vanity
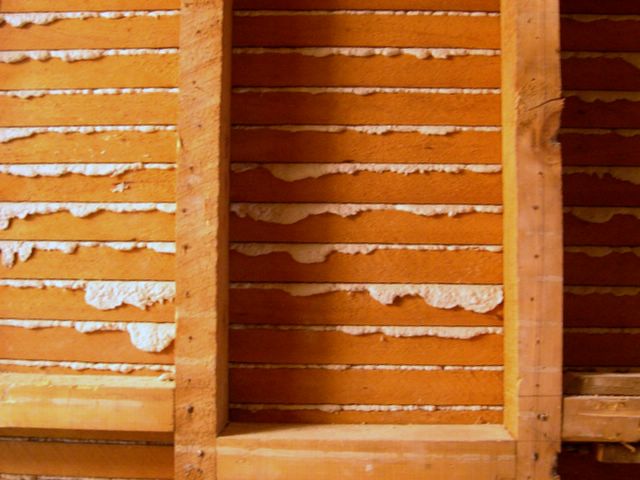
Whoever installed the vanity, I think, intended for the side of it to be flush with the wall.  They cut the baseboard off the wall, or else it was already gone from some previous vanity, leaving a long hole in the wall where the baseboard used to be.  Unfortunately, the installer neglected to account for the fact that the stone counter on top of the vanity hung over the edge by an inch or two, which means that the side of the cabinet can't be flush with the wall.  The installer just left the large hole in the wall instead of patching it and installed the vanity right next to it.  When the weather started getting cold last winter, I would stand there brushing my teeth and feel sudden cold drafts of air on my toes.  All the cold air was rushing up from under the house and blowing through the hole into the bathroom.  Brrr!

I wasn't sure what I wanted to do about the hole, so I just taped a bunch of plastic over it for the remainder of the winter.  My vanity and I entered a stalemate while I planned the best course of action.  The way to really fix it would have been to remove the entire vanity and patch the wall correctly, but that would have been a huge job that probably wasn't worth the time and energy it would take.  My dad is a big proponent of expanding foam, so when he visited in April, he just broke out a can and squirted it all into the hole and the big crack between the edge of the vanity and the wall.  Right next to the hole, the floor tile didn't reach all the way to the wall, as if it had been cut specifically to accommodate the leg of some previous vanity unit (which is weird because I would have thought that this vanity and the floor tile were put in at the same time).  I got some floor grout and just filled up this empty spot with grout.

Patched hole
The foam and grout helped a lot, but the visible part of the wall hole wasn't completely sealed, and it was still bothering me.  After neglecting this battle for a while longer, I finally mixed up some more of my favorite wall plaster and plastered over the hole.  This was followed by priming and painting the hole to match the wall color.  The hole still looks a little weird, but at least it's sealed now, and it doesn't really show unless you're crawling around on the floor.

Part of my frustration with this project is that crawling around on the floor in the bathroom is really hard.  It's a small bathroom, and it's hard to reach back into that corner.  The front of the toilet is very close to the vanity.  I waged a violent battle with the vanity drawer trying to take it out so I could reach the corner.  The drawer is meant to come all the way out, but it runs into the toilet before it really comes out far enough.  You have to get a little creative and engage in advanced geometric maneuvers before you can finally remove it completely.  Getting it back in requires a similar battle.

The toilet is very close to the vanity
Speaking of toilets, whoever installed the toilet put it in with a 5-6in gap between the tank and the wall, which seems kind of dumb given the general lack of space in the bathroom.  Actually, they probably did it this way so that they didn't have to move the piping in the floor.  They just connected the new toilet where the old one had been connected.  As to why they chose such a long toilet, I have no idea.  They could have at least gotten a shorter-bowled toilet so that tall toilet-sitters wouldn't bump their knees into the vanity or have to sit sideways.

Speaking again of toilets, the word toilet was also used at some point to describe a dressing table, but it was also used to describe the act of grooming or dressing. If you read Victorian literature, you'll see references to someone performing his or her toilet.  Today, it's sometimes used to refer to the whole room containing a toilet, which is also referred to as a restroom, bathroom, lavatory, lav, water closet, powder room, head, john, loo, necessary, and probably many other things.  The word toilet derives from the french toile, which means cloth, which originally described either the cloth on the dressing table or the cloth worn to cover the shoulders while the wearer's hair was being dressed.

A lady wearing a commode. From www.fashion-era.com
When I was growing up in Mississippi, sometimes older Southern ladies would refer to a toilet as the "commode".  "Do you need to use the commode?"  "Don't forget to flush the commode."  Like vanity, this was another word we didn't use at home, but I learned in preschool or kindergarten that it meant toilet.  The Oxford English Dictionary says that commode used to refer to an elaborate chest of drawers, and also a small piece of furniture in which the chamber pot was kept, which must be how the word transferred from the furniture to the actual thing you do your business in.  In case you weren't confused enough already, the OED also gives the meaning of the word commode as "A tall head-dress fashionable with women in the last third of the 17th and first third of the 18th centuries, consisting of a wire frame-work variously covered with silk or lace; sometimes with streaming lappets which hung over the shoulders."  In case you didn't know (I didn't), a lappet is a cloth flap that hangs off a headdress over the shoulders (which perhaps you could call a toile if you wanted to).  In the UK, commode is apparently used to describe a wheeled chamber pot used in hospitals by patients with limited mobility.  Interestingly, the OED does not list a common flush toilet as among the meanings of the word commode.  Clearly the OED writers need to pay a visit to Mississippi sometime soon.  The Wikipedia writers, on the other hand, have got it right and actually do mention this colloquial use.

Returning to the discussion of my vanity, I fought another geometric battle and got the lower drawer back in.  Above the lower drawer is what should be an upper drawer.  However, it's actually just another stupid false drawer front panel.  You can't put a real drawer here because the sink drain pipe goes into the wall right where you would have to anchor the drawer runner.  I took out the false drawer front panel when my dad did the expanding foam, but I couldn't put it back using the same hardware because I couldn't reach the screws properly.  So, I ordered some more of those plastic clips I used on the one in the kitchen.  I measured wrong the first time, and it came out lopsided, so I had to take it out and redo it.  I really hate those things.

I thought I was finished with my vanity war after patching the hole and replacing the drawer and panel, but last week, when I was sitting on the commode, I heard a suspicious drip, drip, drip...  I opened the vanity cabinet, and some water I had splashed onto the counter top was oozing under the sink and dripping into the cabinet.  Yay!  Luckily, this is an easy problem to deal with.  I just needed to re-caulk the sink.

Old, yucky caulk that needed redoing
I scraped out the old icky caulk with a razor blade.  I cleaned out some gross goo that was growing in the gap using vinegar and a toothbrush, and then I wiped it all down with rubbing alcohol to make sure the surface was perfectly clean.  I squirted fresh caulk into the crack between the sink and the counter and cleaned it up with my finger and a rag following the method shown in this video.  It came out very neat and was not difficult at all.  I also re-caulked the crack along the back of the counter top where it joins the backsplash.

Broken handle and new handle with the wrong-sized fitting
Right before I bought my house, the previous owner dropped something onto the porcelain faucet handle and broke off one of the four spokes.  She felt really bad about it, since she was about to close on the sale of the house, so she very kindly purchased a replacement handle on ebay, but she didn't have time to install it.  She left it in the house for me.  I had never gotten around to installing the new one (the old one still functioned), but since I was working on the sink, I decided I would finally do it.  I disassembled the handle, but unfortunately, although the new one looked identical, the hardware attaching it to the faucet wasn't the same size, so it didn't work after all.  Luckily, though, I found a little tag inside the faucet with the manufacturer's name and the part number.  I will call them next week and find out if they can send me a replacement part.  The tag also had a date of manufacture on it saying October 2005, which gives me some idea of when the bathroom was redone.

So as you can see, my vanity war isn't completely won, but I've almost prevailed.  We're under a ceasefire until I can consult with the faucet manufacturer.  Unfortunately, I've recently received intelligence that my bathtub has joined forces with the vanity and is demanding a re-caulking of its own.  Ah well, a project for another day.

Update, 12 July 2014:
I called Pfister Faucet, and they were super nice and helpful regarding the broken faucet handle.  The lady looked up the model number and found all the parts for it.  The porcelain handles are still manufactured.  Although the faucet’s warranty is good only for the original owner of the faucet (not me), she said they could make an exception and send me a new handle anyway at no charge.  In fact, she said she would send me two.  It’s a good thing she did because although the fittings are the correct size, the handles themselves aren't actually the same size as the old one.  You wouldn’t be able to tell unless you had them side by side (which, of course, on a faucet, they would be), but the new one is a bit larger and bulkier.  I actually like the smaller, more delicate older ones, but oh well.  So, I ended up replacing both handles.  I'll keep the old ones just in case.  Anyway, Pfister Faucet gets an A+ for excellent customer service.

Saturday, April 26, 2014

Another one of THOSE projects...

Before: Ineffective microwave
My kitchen had an old built-in over-the-stove microwave/vent fan unit that turned out to be rather ineffective at both of these things.  It neither cooked things efficiently nor vented heat and smells from the stove very well.  After multiple days of heroic effort, my dad and I managed to get rid of the old microwave and install a new Broan APE 130 range hood vent fan in its place.

Broan has long been a top manufacturer of range hoods.  My parents have had the same one in their house for nearly 30 years.  I researched several of their models and ultimately picked this one because it got good reviews from customers, had manual controls instead of digital, and had an Energy STAR rating.  I was originally considering one of their QS or QP models, but they got pretty bad reviews from customers, who complained about shoddy construction and endless trouble with the digital controls.  Apparently the controls go bad and the clocks don't keep time well (which doesn't surprise me, as my little countertop microwave loses about 3 minutes every month).  Really, though, the last thing I need in my kitchen is another overly-bright digital display, and who needs digital fan controls anyway?  The model I got wasn't one of their quietest ones, but it seemed like the number of sones shown on the product specs was only for the lowest speed setting of the fan, and the lowest setting for this fan is higher than the quieter fans, so it's sort of misleading.  The fan isn't super quiet, but it's not too bad, and it's certainly much quieter than my parents' 30-year-old fan.  I think I might be able to quiet it down further by putting some kind of sound-dampening material on the ducting that connects it to the chimney.  A lot of the noise is actually the air hitting the ducting and not the fan motor itself.

Grease, holes, and mustard yelllow
This project went the way of most other home improvement projects, in that it took about 5 times as long as we expected and produced a multitude of intermediate steps that had to be completed before we could actually install the thing.  Yep, one of THOSE projects...  First, it took us a while to figure out how to remove the microwave.  Apparently there was a release catch we didn't notice that was supposed to unhook it from the wall-mounting bracket.  Instead, after a lot of yanking, it just sort of bent the bracket until it released by brute force.  Then, a bunch of wall plaster rained down on us.  For some reason, the cabinet above the microwave wasn't installed flush with the wall.  When the electricians rewired the house, they cut a hole in the wall, and the plaster fell into the gap and was sitting on top of the microwave.  Next, we removed the microwave mounting bracket.  It had been rather crudely screwed into the wall and took a lot of work to unscrew.
After cleaning, spackling, priming, and two coats of yellow

Then, of course, there were a bunch of holes in the wall, just like there are every time I do anything in my house.  After cleaning years of grease off the wall (the top half was mustard yellow and the bottom half white), I spackled the holes.  I primed the surface (the shellac-based primer is great for preventing grease from soaking into the wall and covering up old grease) and then painted it the same yellow as the rest of the kitchen.  The tile backsplash looks a little funny because it stops partway up the wall (the wall used to be covered my the microwave), but it will look better after I add some edging tiles to finish it off.

After: New Broan fan installed
Then we set about installing the new fan.  The fan hooks up to some ducting which vents it into the chimney, and the ducting runs through the cabinet above the stove.  Unfortunately, the hole in the bottom of the cabinet wasn't quite large enough, so I had to expand the hole with my jigsaw a couple of times until we had it right.  More mess everywhere.  After a bit more jiggering, we bolted the fan in place and got it hooked up.

Finally, we had to attach the ducting to the chimney.  When I first moved in, the ducting connecting the microwave's vent to the chimney was a sorry piece of dryer vent piping that someone had halfheartedly mashed in there.  Most of the air from the vent was venting into the cabinet itself instead of the chimney.  On a previous visit, my dad had spent several hours meticulously cutting some real ducting to size to connect it properly to the chimney.  Unfortunately, the new vent fan was a slightly different size and position, so he had to repeat this exercise.  Home Depot of course didn't have the size he needed, but he was able to get some from Burgeson's Heating and Air Conditioning, a local HVAC company with a very helpful staff.

The fact that my house has a chimney in that position tells me that there must have always been a stove or perhaps a water heater in this corner.  A capped off section goes through the wall to the back into what is now my bedroom.  Maybe there was a gas wall heater there.  The shaft also goes all the way down through the floor, as if it were meant to vent something under the house.  Perhaps this is the vent for the old floor furnace in the living room, which isn't too far away.  I need to go spelunking in the crawl space sometime; maybe that will give me some more clues.  Wikipedia seems to have a dearth of information on chimney and water heater history, but it does say that Europeans didn't start using chimneys until the 12th century.  Before that, peoples' houses were just full of smoke all the time.

Friday, March 14, 2014

My fault

An earthquake, even a little one like the one that woke me up in the middle of the night a few weeks ago, gives me a feeling of sheer terror and helplessness. If the Big One ever hits, I wonder not just what will be the practical repercussions for me but also if I'll react sensibly or just sit there frozen to the bed with my eyes wide and the adrenaline pumping while my house crumples around me and the San Andreas swallows me up.

In all actuality, this is unlikely to happen.  I mean, it's very likely that I will remain frozen in bed, but the likelihood of one's house crumpling down is far less than one's household possessions becoming flying projectiles.  Flying projectiles are a more likely source of injury in an earthquake than structural damage.  I've been researching this subject since I now live on top of the San Andreas fault.  Actually, if you're in bed when an earthquake hits, the safest thing for you to do is to stay there and put a pillow over your head.  Maybe I'll survive after all.

The San Andreas fault cuts through California north to south. Check out this map of the approximate location of the San Andreas fault.  If you zoom in to Redlands (directly east of Los Angeles), you can see that the fault traces the base of the mountain range just north of town.  This is literally in my back yard.  The San Andreas is the big one, but there are a ton of other smaller faults all over the place around here.  Little earthquakes, mostly too small to feel, are happening all the time.  You can view an interactive map of recent earthquakes from USGS if you want to feel a bit paranoid.

There are things you can do to make your house safer in the event of a big quake.  You can install expensive structural reinforcements and bolt your house to its foundation, but it's probably more important to take care of the flying projectile problem.  Don't leave a lot of nick-knacks around, or use museum putty to stick them onto the surfaces they sit on.  Make sure top-heavy furniture is strapped to the wall.  This isn't a problem for me, as I don't really have any furniture at all. You actually can't sell a house here with a hot water heater that isn't strapped to the wall.  They're not legally allowed to write you a deed or whatever.

I decided I should secure my kitchen cabinets so that heavy dinnerware wouldn't fly out of them if the house starts shaking.  This seemed simple, but of course it wasn't.  I initially purchased a package of plastic hook latches that go on the inside of the cabinets, specifically meant for earthquake-proofing.  The hooks have to be manually flexed in order to open.  If you just pull them they get caught in a little catch.  It's basically a glorified baby-proofing latch.  However, it required quite a lot of strength to push the hooks over the catches, and it was too annoying for cabinets I open and shut regularly.  I tried it for a week and decided it wasn't going to work for me.

So, I looked around online for other earthquake-proofing products.  I saw a few products that were supposed to only lock during a quake.  One had a hook that supposedly would drop down only when shaking is occurring.  It looked dubious to me because it would be nearly impossible to test, and you wouldn't find out if it worked until it actually mattered.  Also, since the direction of shaking isn't predictable, how can you guarantee that it would shake in the right way to send the hook into place?  Another product remained locked with a plastic hook until you push the cabinet door inward, and then it releases the catch.  This also seemed dubious to me.  If the shaking were strong enough and the cabinet door heavy enough, couldn't the force of the shaking press the door inward by itself, thus releasing the catch?

Barrel bolt (from the Home Depot catalog)
I gave up on earthquake-proofing products and decided to just install sturdy latches on the cabinets.  I had this brilliant idea to put barrel bolts on them, the kind of cylindrical sliding latches you see on bathroom stall doors.  By "brilliant idea", I actually mean "very Dumb idea, and poorly executed".  I decided that I should install the latch with bolts that went all the way through the cabinet door.  The cabinets are particleboard, and I figured that wood screws would just rip out if put under sufficient strain, whereas a bolt secured by a nut on the other side wouldn't budge.  Okay, that part is still brilliant.  The next part is Dumb.  I drilled a bunch of holes through my cabinet door to secure the latch in place.  I put the latch on and then realized to my chagrin that the bolts/nuts stuck out through the back of the door and hit the cabinet frame, preventing the door from actually shutting.  Duh!  So I drilled a bunch more holes higher up on the cabinet door so the bolts wouldn't hit the frame.  I installed the latch.  I tested the latch by pulling on the cabinet door handles.  The doors swung outward, and the cylindrical barrel bolt just slid right out of its catch.  It did no good whatsoever.  Barrel bolts don't work when both sides are on movable surfaces.

I generally pride myself on my mechanical aptitude, but perhaps I should reevaluate.  Ah, whatever.  I blame it on The Dumb.

Spring-loaded hook latch catch thingy
After thoroughly investigating all my other latch options, I finally settled on some spring-loaded hook latch catch thingies (there must be an official name for these) like what you would see on the outside of a toolbox.  I drilled some more holes in my cabinet door and installed one of them.  It was perfect!  It's easy to open when you need to, but it won't open when it's locked.  My plates and bowls can fly around inside the cabinets as much as they like, but they won't be able to escape and decapitate me.  I secured the latches with bolts that go all the way through the cabinet, and I used lock washers to hold the nuts in place so they don't loosen up over time.


One of my cabinet doors has a bunch of holes in it, and my kitchen is ugly!  But it isn't my fault, I had to drill the holes to keep the cabinets shut. It's The Dumb's fault that they didn't work in the first place. But the San Andreas made me drill the holes to latch the cabinets to keep me safe in the first place...second place.  It's your fault!

Saturday, March 8, 2014

Dispenser of happiness

I haven't done any major work lately, just a lot of little things to improve my quality of life.  None of these things are particularly interesting.  I was going to write one interesting thing related to each one, but I got distracted reading about the history of toilet paper.  So, I'll give you the list of dull but life-improving things I've done and then write about toilet paper for a while.
  • I put up a fluorescent light over my kitchen counter.  This was super easy and makes it much easier to see when I'm cooking.
  • I put up a more convenient towel hook in the kitchen.  Yay.
  • I installed a better rack of hooks in the bathroom.  This simple project went the way of other simple projects.  I took the old rack of hooks off the door where it was hung and discovered that the door had been painted around it and that there was a hole in the door behind it.  I spackled the door and painted and put up the new hooks.
  • I finally patched the bathroom ceiling around where the new vent fan was installed.  I ended up using the same method I used for the walls, and it went fine.
  • I got a new shower head in the bathroom.  I didn't like the harsh spray from the old one, and it was so gunked up with minerals that an hours-long vinegar soak didn't help it.
  • I installed a better toilet paper dispenser. 
Old Dumb toilet paper holder
New non-Dumb toilet paper holder
My toilet paper dispenser replacement falls under the category of "Dumb reduction" in addition to "quality of life improvements".  The old toilet paper holder was one of those fancy designer toilet paper holders that's shaped like a ring and only has one connection to the wall.  The toilet paper roll slides onto the ring.  However, the single point of connection with the wall means the thing is doomed to always unscrew itself and spin on its axis.  Mine ended up kind of upside down at one point.  Also, it was just screwed into the wall plaster, which is kind of precarious for something that is pulled, bumped, and jostled so often.  I decided it had to go.  I bought an equally nice-looking non-fancy non-designer toilet paper holder of the traditional kind for about $4 and screwed it into the hardwood window frame. It's so nice to not be annoyed every time I go to use the toilet.

Toilet paper was used in China as early as 1500 years ago.  Toilet paper as a commercial good in the United States was introduced in 1857 and was sold in packets of flat sheets.  Rolls and dispensers didn't come about until later.  Unsurprisingly, Americans use more toilet paper per capita than people anywhere else in the world.  More surprisingly (to me, anyway), people in other developed countries don't use toilet paper at all.  In parts of Europe, people commonly use bidets to wash with water.  My family in Greece have bidets in their bathrooms, but I could never really figure out the mechanics and practicality of how one was supposed to use them.

Of course, throughout the ages, people have used a wide variety of things for cleaning themselves after going to the bathroom.  Things like leaves, sticks, hay, moss, seaweed, wool or fur, hemp, rags, corncobs, fruit skins,  rocks, sand, sea shells, snow, sponges.  Sears catalogs were popular for this purpose in rural America.  The Wikipedia article on anal cleansing is actually quite fascinating and well worth a read.  It's an age-old problem, and toilet paper isn't the only solution to it.

And now, I'm off to bed, after a quick trip to the potty.

Saturday, February 8, 2014

Thermostasis

I got a programmable thermostat!  This is one of several easy quality-of-life improvements I've made recently.  More on quality-of-life improvements another time.  For now, here's a long, rambling post about thermostats.

Prior to 1996, my house had no central climate control system.  There was a large gas floor heater in the living room and no other heat, even in the bedrooms.  I think there might have been a built-in wall AC in the kitchen, since it's obvious that the wall above the kitchen sink has been patched in a big square shape, and there was a 220V outlet up there.  It must have been really hot in the summer and pretty chilly in the winter.  I have a pretty high heat tolerance, but the apartment where I lived before I moved in here would get up to about 95F inside during the summer if I didn't use the AC, and that's a bit much even for me.

The lady who bought my house in 1996 did a lot of work, including modernizing the kitchen and bath and installing the central heating and cooling system.  I'm not overly fond of the forced-air heat.  It blows a warm hurricane of air into the rooms when it gets cold but doesn't heat evenly and dries out the air terribly.  If I had an infinite amount of money, I would hire a commercial plumber to install a hot water radiator system.  Still, forced air heat is much better than no heat, or uncontrollable heat, which is what I had in my old apartment.  Controllable heat is a good thing.

Thermostats were invented during the scientific revolution.  The earliest known one was from the early 1600s and was used for a chicken incubator.  They didn't really become common until they were needed for textile mills in the industrial revolution.

The thermostat that was here when I moved in did its job, but it wasn't programmable.  You could set a temperature, and it would stay there, but you couldn't set different temperatures for different times of day.  My thermostat is in the living room, which is generally chilly.  At night, the heat runs and tries to warm up the living room.  Meanwhile, it is pumping more and more heat into my bedroom, which stays warmer because it has fewer windows and less exterior wall space. I would go to bed freezing, but then it would get warmer and warmer and warmer as the night went on, and I would wake up sweating at 4am.  This was neither comfortable nor energy efficient.

Additionally, the old thermostat seemed overly eager to keep the temperature exactly at the temperature you set.  It would turn on, heat for 5 minutes, and then go "I'm hot!" and turn off.  Then 5 minutes later, the temperature would have dropped a small amount, and the thermostat would go "I'm cold!" and turn on again.  It would cycle on and off frequently, which also isn't very energy efficient.

I researched different types of programmable thermostats quite a bit, trying to find the right one.  There's a popular model on the market right now called the Nest, which is a highly-computerized thingy that programs itself based on how you set it during a training period.  I read very mixed reviews of it and ultimately decided it wasn't for me.  However, my aunt and uncle had been given a Nest as part of a solar panel installation, but they absolutely hated it and generously offered to give it to me.  So, I ended up with a Nest after all.

Swapping out my thermostats went pretty much the same way my other house projects have gone.  I took the old thermostat off the wall and discovered that there was a sizable hole in the wall where the thermostat wires come through.  That's not good because then all the cold air from under the house pours through the hole onto the thermostat's temperature sensor, so it doesn't get an accurate reading of the temperature inside the house.  Also, when the living room was last painted, they painted around the thermostat.  Of course.


I spackled the hole and did something I thought was rather clever.  I got a plastic thimble from a sewing kit I had, cut a hole in the back, and used that as a sheath around the thermostat wires.  I spackled the thimble into the wall so that there's only a small hole for the thermostat wires, but something they can easily slide in and out of.  Smart, eh?  Then I painted the wall.

The Nest thermostat hooked up easily.  The digital user interface is easy enough to use, but it connects to your wi-fi network so you can control it from your computer or mobile device.  The control panel is simple if somewhat glitchy.  I really like that it shows you how much the system was in use, including the total number of hours per day it was running and a breakdown of exactly when.  I don't know if this information is terribly useful, but it's fun to look at.


I gave up on the training period after a few days and just programmed it the way I wanted it myself.  Overall, the Nest strikes me as overly engineered.  Really, I don't need my thermostat to learn my habits when I can just tell it what my habits are and what I want.  It has a motion sensor and puts your heating system into "away" mode when it thinks you aren't around in order to save energy.  However, since the thermostat is in the living room, and I still don't have any living room furniture and consequently don't spend much time in there, and since I don't move around the house when I'm asleep, it thought I was never home and always turned the heat off.  Thankfully, it lets you turn off the motion sensing function.

Despite these flaws, it's working very well, and my house has been much more comfortable since I installed it.  I hope to see a decrease on my gas bill as well, but the weather's been mild, so it will be hard to compare.

Thursday, January 23, 2014

Revisiting The Dumb: false drawer front panels

Recall that there exists and all-pervading force in the Universe called The Dumb which constantly seeks to exert itself.  It commonly manifests in the design of mass-manufactured products.  You know those fake panels in front of sinks that look like drawers but are actually just fake panels?  Yeah, those.  Those are surrounded by a huge and infectious cloud of Dumb.

The first thing I did when I got the keys to my house was to walk around and do a thorough inspection of everything.  I opened up every closet and cabinet and drawer.  And, of course, when I got into the kitchen and approached the false drawer panel in front of the sink, I succumbed to The Dumb.  I pulled the darn thing right off.  I knew it wasn't a drawer, but I still yanked on the drawer pull that was on it and ripped it out.

Further inspection of the panel showed me that it was actually supposed to open (so having a drawer pull on it wasn't necessarily completely Dumb). It was supposed to pivot out from the top so you could store sponges in a little pocket inside.  Dumb Number One: Eeew!  Why would you store sponges in an enclosed plastic pocket that would get all slimy and where you can't reach them when you need them?  Dumb Number Two: The springs on the pivot mechanism were too strong for the particleboard that makes up the panel, which is why the mounting screws just ripped right out of it. Dumb Number Three: The panel wasn't mounted using all the screw holes anyway.

Dumb reduction - false drawer front panel installed
I tried to put the thing back together and remount it, but the particleboard was too damaged to put the screws back in.  I tried epoxying it, but it didn't hold.  So, I decided to forgo the spring pivot mechanism and mount it permanently in place.  I didn't want the Dumb sponge pocket anyway.  I tried to use L brackets or corner brackets, but there wasn't enough space to reach a drill up between the sink and the panel, so that didn't work.  I went to both Home Depot and Lowes to ask for what hardware I should use to mount the stupid thing, and nobody at either store had anything useful to say.  Some internet research finally yielded the way to do it right.  They make some little plastic clips that you glue or screw to the panel.  They flex enough to pop the panel into place, and the catch holds them against the counter.  I have no idea why they don't carry these at home improvement stores or why their employees don't know about them.  It seems like something everyone with a kitchen would need at some point.
Sponge holder

Anyway, once I got my clips in the mail, I stuck them on and popped the thing in place in about 15 minutes.  No more hole in my cabinetry!  Oh, and I have a little wire rack sponge holder that sticks inside my sink with suction cups.  My sponge can dry out in the open air, and it doesn't leave a puddle next to the sink when I set it down.


Monday, January 20, 2014

Spectrophotometer

Bassoon room patch - light green
Living room wall patch - red
This weekend, I touched up the wall paint in the areas where I patched the holes cut by the electricians during the house rewiring.  My house's previous owner told me that she researched colors that would have been used in a Craftsman-style bungalow in the 1920s and had the colors she picked out custom mixed.  She chose a deep red for the living room walls.  I don't think I would ever have been bold enough to paint it that color myself, but I actually really like it.

Custom-mixed colors can be problematic when you need to match them for touch-up painting.  It used to be very difficult.  However, these days, paint stores can match paint color samples electronically using a spectrophotometer.  It shines a white light at the paint sample and measures the wavelengths of the reflected light.  The detector has a bunch of filters that let through only light of a very specific wavelength.  It tries all the different filters and measures the amount of light reflected from the paint sample that is able to pass through each.  This way, the computer knows how much of each wavelength makes up the color.  The computer then calculates the mix of paint pigments that would replicate the color.

I didn't get to use a spectrophotometer for this project, though.  Maybe I'll do it just for fun some day.  For this project, conveniently, I found all the right paint colors in the garage, left by the previous owner.  Some of the paint was still good, but the red living room paint was all chunky and gross.  I just took it to Lowes, where she bought it, and they were able to replicate the custom color using the numbers from the sticker on the can.  Their numbering scheme presumably has to do with the relative amounts of each pigment, as well as the type of base paint and the shininess (eggshell, satin, etc.).
Bedroom patch - darker green
Kitchen patch - yellow

My wall patching is officially complete, and I would say it was highly successful.  The patches blend right in.  You can still see them if the light is right because the texture doesn't match the rest of the wall, but you wouldn't notice them if you weren't looking for them.

(Note that the colors in the photos here aren't very true to the actual colors on the wall.  My phone doesn't take very good pictures, but you get the idea.)

Saturday, January 11, 2014

Patching lath and plaster wall holes

One of my wall holes, with new wires
As you might recall from my previous post about Wiring and The Dumb, I had my house rewired immediately after I bought it.  The electricians had to cut some small holes in the wall in order to run the new wires.  I have now (finally) successfully patched those wall holes.

Prior to the popularization of drywall in the 1950s, interior walls were made of lath and plaster.  The
Lath and plaster wall, from Wikipedia
lath (thin wood slats) formed the wall, and the plaster was placed onto the lath. The plaster kind of oozed between the cracks in the lath, and when it hardened, the oozed part helped hold the whole thing up.

Naturally, my walls are lath and plaster and not drywall.  This post is about how to patch holes in a lath and plaster wall.

The procedure goes like this:
  1. Clean the hole to remove loose wood shavings or bits of plaster.
  2. Glue some sort of backing behind the hole.
  3. Mix up some plaster material and put it in the hole on top of the backing.  If you didn't manage to get the hole all the way filled, you will need to do another coat after the first is dry.
  4. Sand down the patch to be flush with the wall, if your trowel work was suboptimal (mine certainly was).
  5. Prime paint the new surface.
  6. Apply the top coats of paint to match the rest of the wall.
You need to put a backing behind the hole so you have something for the plaster to stick to.  They make special screen material for this purpose, or you can do what I did and just use some paint stirrers and glue them in as a sort of artificial lath.  Home Depot and Lowes give away paint stirrers for free (yay!).  I cut the paint stirrers to the correct sizes for each of the holes.  I even wrote my name and the date on them in case anyone deconstructs the wall at some point and bothers to notice the patches.  I drilled two little holes in each of the sticks.  This was to help me hold them in place while I was gluing them to the inside of the walls.  I set them into place on the wall's interior surface with some wood glue where they were to join the real lath, threaded some brass wire through the holes, and tied off the brass wire around some pencils to hold them in place while the glue dried.  It worked very well, and the wood glue dried quickly and very solidly.

When all the holes had their backing, I had to do the plaster.  At the recommendation of the guys at Home Depot, I went with Rapid Set® OnePass® Wall Repair and Joint Compound.  This stuff was pretty easy to work with.  You just mix it with water (trying not to breath in too much of the dry powder, which isn't good for you), and then daub it into the holes with a trowel.  I didn't have a lot of luck with my trowels.  I think my trowel work needs some practice.  The holes were kind of deep, and I found that the plaster would sag at the bottom of the hole and hollow out at the top, so I had to do two coats to get it flush with the surface all around.  For mixing this stuff, up, an old aluminum pot worked really well because the chemical didn't eat it, and if you don't use all the plaster, it will harden and then break off, so you can reuse the pot (obviously not for cooking).

Drying plaster patch
After sanding
After priming
The OnePass package claimed it would dry in 20 minutes, but I wasn't convinced that it was really, fully dry until the next day.  It didn't matter anyway because I procrastinated another month or so before I got around to doing a second coat and then sanding it down.  At least the holes were plugged. They had been contributing massively to cold air drafts.   But, after applying a second coat, I sanded them down to get them truly flush with the wall surfaces.  A power sander was invaluable here.  It would have taken me ages to do it by hand.  Wear a dust mask, and be ready to spend a lot of time cleaning up dust afterwards.

After the sanding was done and I wiped up all the dust, I prime painted the new surfaces.  Note: Don't use the disposable spongy paint brushes with shellac-based primer because it's so watery that the spongy brushes just swell up and become useless.


The next step (when I get inspired) will be to do the top coat of paint.  I don't know the exact paint colors, so I will have to see if they can be matched.  Stay tuned for a post about paint color matching technology at some point.

Oh, and there are still some holes in my closet and bathroom ceilings that I have to fix, but that's a project for another day.

Friday, January 3, 2014

American Craftsman style motion sensor porch lights

Okay, boys and girls, today we're going to talk the American Craftsman style and about motion sensor porch lights.  We will also practice the technique of juxtaposition and talk about American Craftsman style motion sensor porch lights.

The Arts and Crafts movement, of which the Craftsman style is a part, was an architecture and design movement that focused on high quality workmanship, unique designs, and functionality.  It lasted from approximately the 1890s to the 1930s and was a reaction against both the rise of factory mass-production and the highly elaborate and ornamented Victorian style.  The Arts and Crafts movement began in Britain, but it was soon adopted by Americans who created their own American Craftsman style principles.  The Craftsman style manifested in all types of products, but it is especially visible today in architectural structures still remaining from the Craftsman period.

Copyright 2013 by Andrew Morang
Craftsman-style architectural features include:
  • a visible, sturdy structure (such as exposed rafters)
  • clean lines (as opposed to circular towers and curlicues from Victorian structures)
  • large overhanging eaves
  • a front porch that is beneath an extension of the main roof
  • natural materials, including hand-crafted stone or woodwork

You can see all of these characteristics in my house.  My house has large exposed linear structural beams and prominent river rock on the front porch and chimney, and the eaves and front porch obviously fit the bill.  There are a lot of other houses like this in the historic district of Redlands.  It's not too hard to pick them out.
A porch light is ... never mind.  You know what a porch light is.

My front porch and back porch both had lights on them, but neither had any way to turn them on from the outside.  As the days grew shorter as fall progressed, I discovered that this was seriously annoying.  I would get home from work in the dark and fumble around trying to see my keys and find the keyhole.  Consequently, I decided to install motion sensors so the lights would turn on automatically when I approached the doors.

There are plenty of motion sensor porch lights on the market (some of which are horrendously ugly), but I sort of liked the lights I already had.  Both fit the Craftsman style, and the front porch one, at least, was fairly old.  And, well, why get rid of something if it works well?  Unfortunately, there aren't really very many good options for retrofitting an old light fixture with a motion sensor.  I think there are a few external sensors you can actually wire in, but that's sort of a pain.  They also make a screw-in kind you can screw into the bulb socket. The bulb goes into the little screw-in attachment.  Most of these have the sensor on the screw-in attachment itself, which doesn't work at all if the bulb socket is inside the fixture, because then it will never sense any motion unless you stick your hand up inside the fixture.  There are a few, however, that screw in but have a wire that goes to an external motion sensor that you can mount elsewhere.

New front porch light
All of this drove me nuts for a while, and I ultimately decided to buy a new fixture for the front porch with a built-in sensor.  As I mentioned, a lot of the fixtures on the market are horrendously ugly, but I found one (mass-produced in a factory, no doubt) that mimics the Craftsman style and looks really good on my front porch.

Of course, installation wasn't completely straightforward.  I took down the old light.  The electricians, during their rewiring, had installed a nice new electrical box, but there were large gaps around the sides of the box, so I thought I'd better caulk it to reduce drafts.  Also, last time someone painted the exterior of the house, they just painted around the old light fixture.  So I thought I'd better paint.  They also painted around the mailbox, so I thought I'd better take that down and paint under it, too, while I was at it.  So, after some sanding and painting and caulking, I was able to wire up the new light.  That part worked perfectly, thanks to the brand new color-coded wiring in the wall.

After that, I danced around the front yard for a while to test the range and put some electrical tape over part of the sensor to make sure it didn't turn on every time a car drove by or someone walked by on the sidewalk.

For the back porch light, I decided to experiment with one of those screw-in motion sensors with the wire to the external sensor unit.  I thought I could snake the sensor wire out through the top of the fixture (because it has a small gap in it) so it wouldn't really show.  Unfortunately, the screw-in unit, wire, and external sensor are permanently attached to one another, so you can't snake the wire anywhere.  Dumb.

Old front porch light; new back porch light
Well, whatever.  The back porch light fixture didn't really fit the space well anyway.  It was too large and was kind of rammed in there under the roof eaves.  The former front porch light was of a different design and hung down from its mount, so I decided to just swap the two out.  The mounting structure on the back was pretty messed up (probably because they had to do something funky to get the former light fixture to fit in the space), but I did the best I could and successfully got the former front porch light hung up on the back porch.  It fits much better.  I installed the screw-in sensor mount and placed the external sensor.  It works, too, although the wire to the sensor just hangs out of the bottom of the fixture, which is what I was trying to avoid in the first place.  Oh well.
Old back porch light; future laundry room light

I kept the old back porch light because I liked it (also kind of Craftsman style).  I think I will install it in my laundry room, which currently just has an exposed bulb sticking out of the wall.

Incidentally, you can't use CFL bulbs with motion sensors, for the same reason you can't use them with dimmers.  Urgh!  I bought a package of halogen bulbs, which look like incandescents but are a bit more efficient.

At least, in the end, I can happily say that my quality of life has improved drastically by having motion sensor lights.  It's such a simple and inexpensive thing, but it's so nice to actually have a light that turns on when you're trying to unlock the door.  As a side bonus, I've still managed to maintain my Craftsman-style curb appeal.