Friday, August 23, 2019

Painting done correctly, and redwood trees

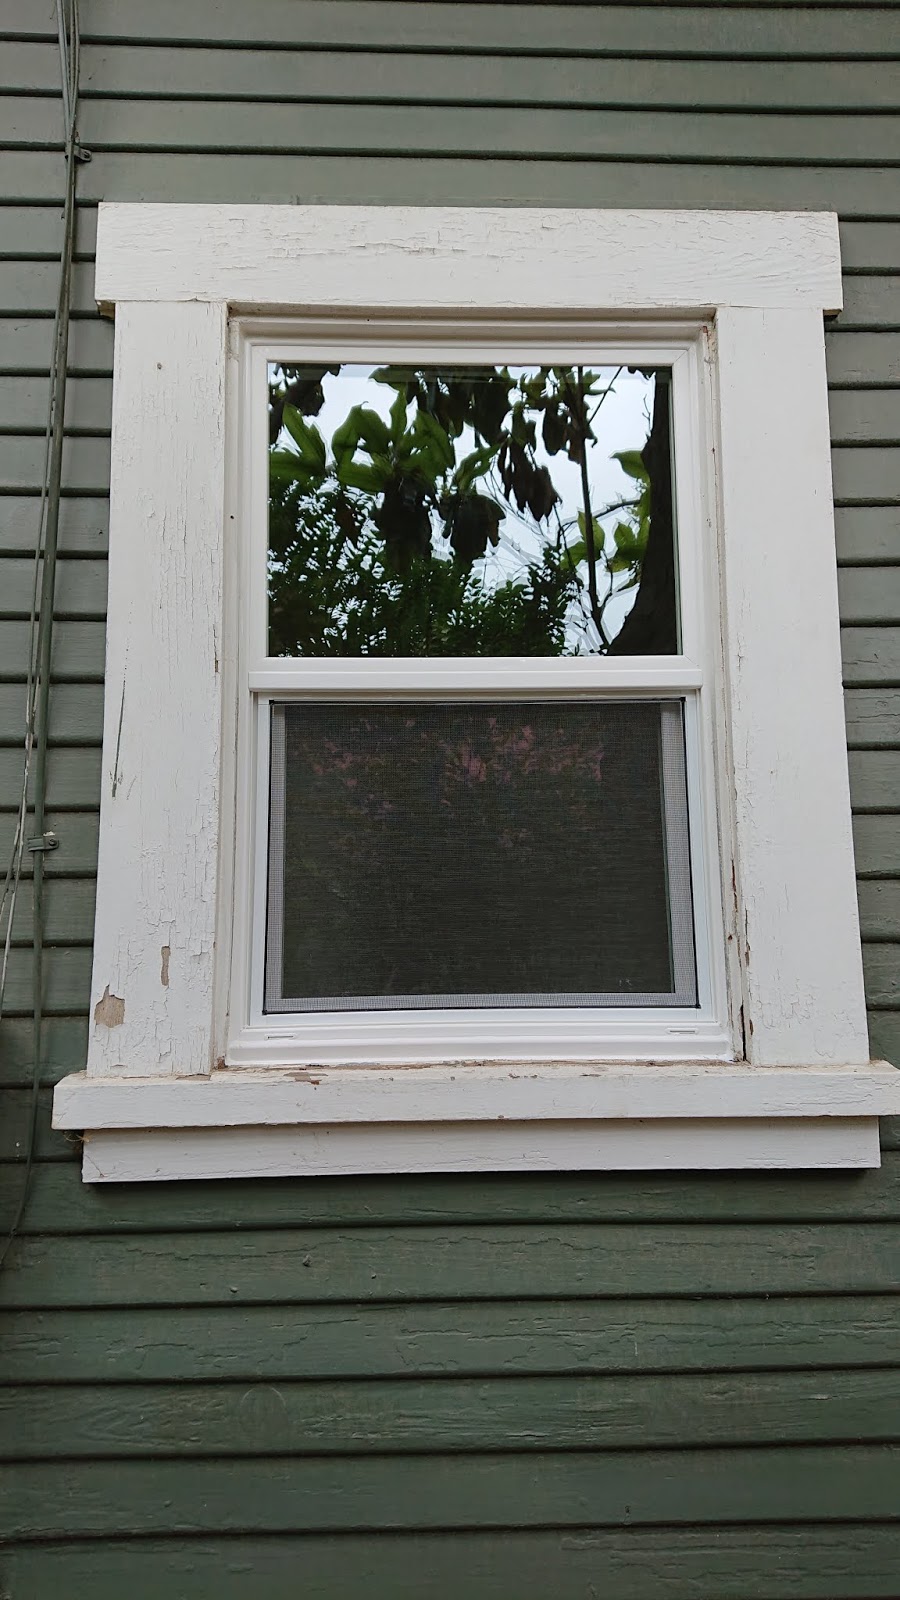
After my disastrous experience with the shoddy painters who ghosted me, I was left with a half-finished project and too much stress.  Luckily, I found another painter to dig me out of this mess.  Julian Garza came highly recommended by a neighbor and colleague, and I spent the time to thoroughly stalk him before hiring him to strip and paint the exterior window frames on the house and all the trim on the garage.  It took him forever, but he did it the way I wanted it done (the correct way), and he did a great job. (Of course, after my experience with the other guys, I was very up front about my expectations and was watching him like a hawk.)

He used a chemical stripper to remove the paint to reduce dust and wore a respirator, long sleeves, and chemical-resistant gloves the whole time.  Big change from the other guys who just happily sanded away and breathed it all in and made no attempt to control dust at all.  Once he'd gotten as much off as he could by scraping with the chemical stripper, he used a power sander to get the remainder off and smooth down the wood.

He also primed carefully with the right kind of primer, filled holes where needed, was careful of my hardware, and even carefully preserved the screw holes for my weather stripping so I could put it back up easily.

He started at 6:30am every day and finished up by about noon on account of the heat. Totally reasonable in my opinion just for his own comfort, but also, the chemical stripper and the paints just don't work properly above a certain temperature, and it was HOT some days (110F).

This project was a ton of work, even though it was only the trim and only the garage and half the house.  I am not eager to repeat this anytime soon.  I asked him hypothetically what it would take to strip all the siding and redo it, and he said it wouldn't be worth it and that it would be better to just replace the siding...

Anyway, the end product looks great.

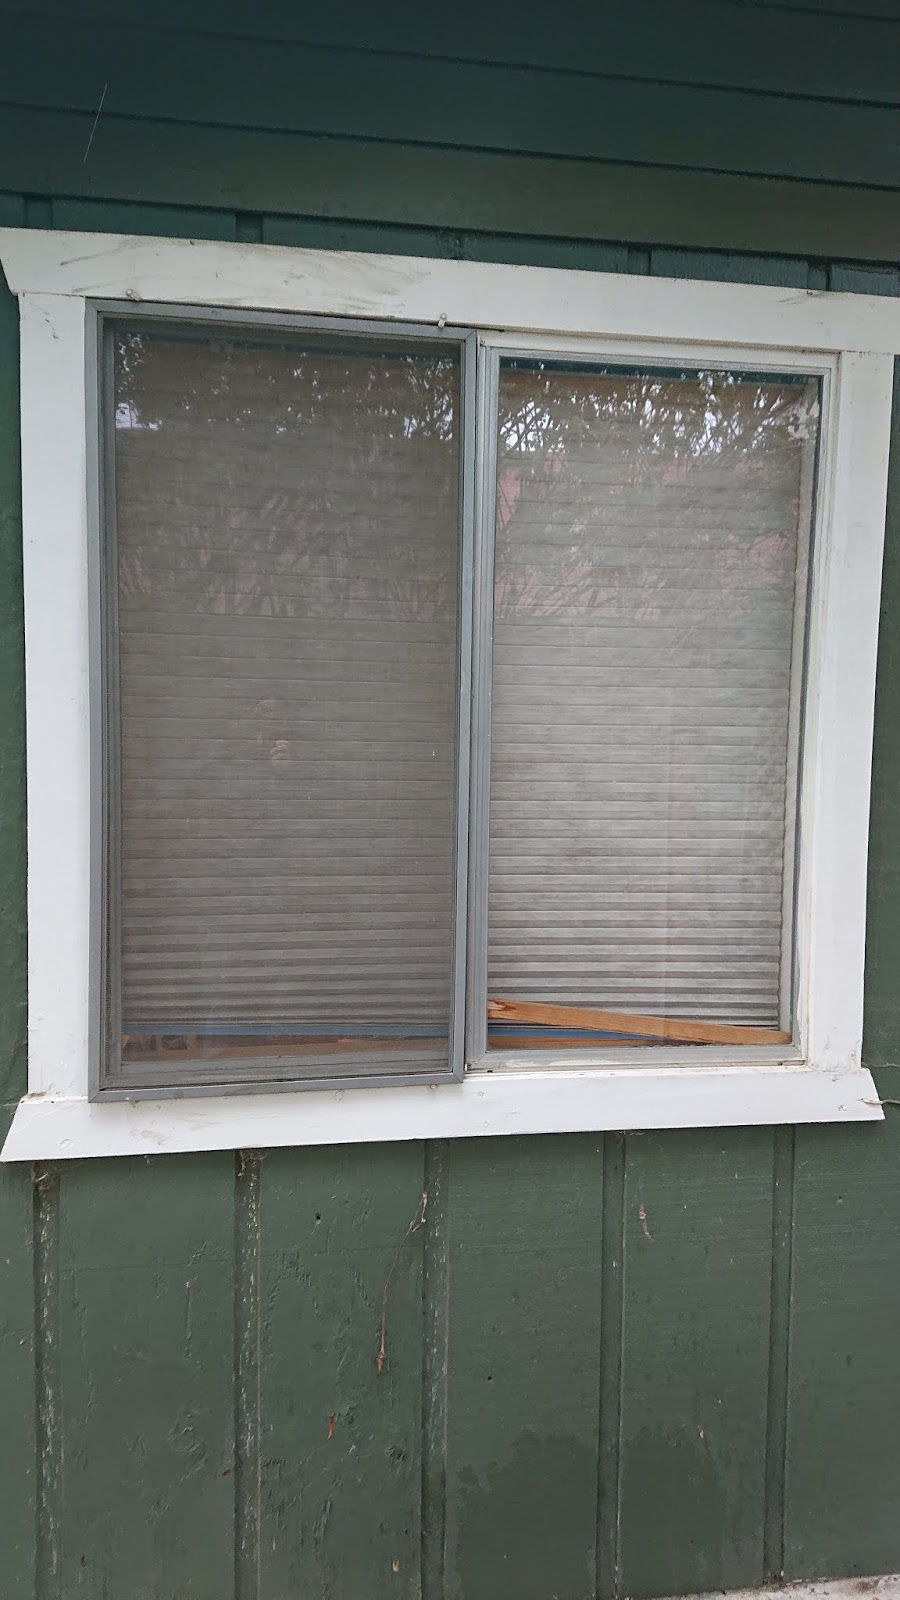
Bathroom window: before
Bathroom window: after


My house is made of redwood.  I knew that before this project but hadn't really given it much thought, but with all the paint stripped off, you could see the deep red color of the wood.  They built houses here of redwood because it was strong and because termites don't eat it.

Redwoods (Sequoioideae) are magnificent trees native to California. They can be among the tallest, largest (by volume), oldest, and thickest-limbed trees. Take a moment to enjoy Wikipedia's "List of superlative trees", both for the trees and for the amusement factor that the page itself exists.  Redwoods make appearances in most of the superlative lists.

Redwood trees are endangered now, and I feel bad that the builders of my house contributed to this endangerment. But, similarly to how I feel about my mahogany floors, I'm glad that the wood was put to good use in an end product that can be preserved and valued for many generations.  True, the 99 years my house has been around is very short compared to the lifespan of a redwood tree, but hopefully my house can continue as a viable living space for at least another century or so.

I'll leave you with an amusing redwood tree photo from Forest Falls in the mountains near here. This redwood tree was like "Hey, there's rocks here where I want to grow. Oh well, I don't care." and just grew over them.

Sunday, July 28, 2019

That time I got ghosted by some shoddy painters

"Ghosting" is a dating term referring to the case where one party in the relationship simply disappears with no word to the other.  They never officially break up but instead just stop answering calls and texts.  This week, I got ghosted by some shoddy painters.  Being ghosted in a romantic relationship must be extremely painful and frustrating, but actually, being ghosted by my painters was the least painful and frustrating part of this experience and probably the best outcome for me.

After my recent window and door installation, I had needed some paint touch-ups inside, and I realized that the exterior frames around the windows on the west side of the house were chipping pretty badly.  I didn't want to spend days on a ladder scraping lead paint off my window frames, so I decided to hire a painter.  I found a guy (Mark St. John from DunnRite Painting, Inc. Lic #723044) with a lead-safe certification and experience working on other old houses in this neighborhood and good reviews on Yelp.  When he came by to give me a quote, he seemed really competent and knowledgeable, and I felt good about it, so I hired him.

I waited for about 6 weeks for him to get finished with other jobs, and during that time, communication wasn't great.  I finally heard from him around 2pm on a Sunday saying they were ready to start work the following day.  I asked what time they would be arriving, and he didn't respond to my message until 7pm that evening, saying that they would be starting at 7am the next morning.  Great, thanks for the warning. <eye roll>

He arrived with his crew, went over the work to be done, and then he left, leaving just his crew to do the work.  He did not give me a written contract. I was stupid and didn't realize this or think about it until later, but actually, this probably worked in my favor in the end.

Right away, I wasn't super confident in the work the crew was doing.  They were getting dust everywhere and weren't even wearing simple dust masks (so much for lead-safe practices), they didn't take down the door I'd asked them to strip and paint but were instead just kind of scraping away at it as it was flopping around on its hinges.  They didn't strip or fully scrape off the chipping paint, and I didn't realize what was going on until they had instead filled in the cracks between the chipping paint with wood filler and then primed over it.

After they left for the day, I inspected the work more carefully and decided that I was NOT satisfied and that I needed to say something about it.  I texted the boss saying I wasn't happy and sent him some photos, asking him to come over the following morning to go over the work and discuss a solution.
They primed over still-chipping paint.

Forgot to do the side of the trim.

Used wood filler to conceal chipping paint.
All-around sloppy job on the door I asked them to strip.

My full list of complaints, which I ultimately sent to the boss later, was as follows:
  • Failure to adequately scrape or otherwise remove existing paint from surfaces, instead doing only minimal scraping and some sanding and then priming over surfaces that still had chipping paint and applying wood filler to conceal chipping paint
  • Failure to adequately control sanding dust inside the house when working outside by closing the windows or applying plastic covers to the insides of the windows when they needed to remain open
  • Failure to adequately cover floors and furniture inside when working inside
  • Failure to vacuum or adequately wipe dust from surfaces prior to painting
  • Using a shellac-based interior-rated primer on large exterior surfaces
  • Reluctance to remove door hardware prior to painting
  • Painting portions of the kitchen window trim that were not requested and without first preparing surfaces
  • Applying paint in the bathroom that was lumpy
  • Neglecting details, such as the edges of the exterior trim

This all made me very nervous because I absolutely hate having confrontations with people, and I knew this was going to be very awkward. Plus, I just felt really dumb for having made the mistake of hiring these people and not stopping them sooner in the day.  I felt that my home, my personal space, had been really violated and damaged.  So, I waited nervously all that evening and didn't get a response.  I sent an e-mail with the same photos and info as the text.  Nothing.

The next morning, nobody showed up at 7 like they said they would.  Around 8:30, one of the crew guys showed up and said he was just there to collect his stuff and that somebody else would be finishing the job.  I still had heard nothing from the boss.  I texted the boss saying that the guy had come and gone and asked what was going on.  Nothing.  Hours later, he wrote back and said "I'm not sure let me check".  Never heard from him again.

That evening, I e-mailed him to officially let him know he was fired, to give him my list of complaints (above), and to tell him that I was not going to pay him anything.  This is where it was to my advantage to not have an official contract because he would have no grounds to take me to court over this if he wanted to.

My guess is he figured that it was cheaper and easier for him to cut his losses for a day's labor and just disappear rather than come back and fix the mess the guys made. That's okay.  Good riddance.  I don't want any of his guys in my house again.

Sigh...so now I need to hire another painter to not only do the job but to also undo the damage the other guys did.  Violated and ghosted...it's been a great week.

Thursday, July 25, 2019

Might I have a bit of earth?

The Secret Garden has been one of my favorite books ever since my mom first read it to me when I was four years old.  The book is filled with vivid descriptions of the wonders of growing things and the miracle of springtime.  I would love to have a set of beautiful English walled gardens I could watch through the seasons.  Unfortunately, SoCal is not England.  Our seasons range from warm to hot, it never rains, and we don't really have a dramatic springtime.  If you were to lock up a garden and leave it alone for ten years, it wouldn't turn into a wild paradise. It would just die.  The central metaphors of The Secret Garden would have utterly failed if the garden had been here in SoCal.  Mary, Colin, and Mr. Craven would have all gotten even more miserable and then died, and Dickon would have gone off into the chaparral and started a forest fire.

When I bought my house nearly 6 years ago, I imagined turning my backyard into a wonderland of drought-tolerant shrubbery, and I imagined by the nicely xeriscaped front yard would just sit there and look nice and not get overtaken by weeds.  Neither of these things have come to pass.  I learned very quickly that I actually have no interest in gardening, and I don't really like spending time outside here because it's always hot and dry and excessively sunny.

Plus, there's a huge learning curve for an Easterner like me.  I just didn't even know where to start.  The couple of times I've gone to plant nurseries, I've been overwhelmed by choices and lack of information, and when you ask the staff what to do, they give you 500 options and don't seem to really know what they're talking about.  I just wanted someone to point and like three different things and say "plant this".

Also, most of the stuff I see in nurseries seems geared toward people who have irrigation systems of some sort in place, either traditional sprinklers for grass or drip irrigation for more drought tolerant stuff.  I don't want to garden like that.  I want to get it established and then leave it alone.  When I say this to the nursery staff, they look at me like I'm an idiot.  Maybe I am.  But, I do see trees and shrubs around in locations where they're clearly not being watered, so I don't know why then nurseries aren't just selling that stuff.  Or maybe it's in there, but I don't know how to find it, and the staff doesn't know how to guide me to it.  Maybe in the future, I should just go for a drive or a hike and take pictures of all the stuff I see growing with no water and then try to figure out what it is and plant that stuff.

Anyway, thinking somewhat along those lines, six years is enough time to observe the growth patterns of what's already in the yard and to determine what will thrive and what will die.  In the xeriscaped front yard, patchy grass and other weeds grew back up through the weed cloth and decomposed granite.  Most of the shrubs died or just failed to thrive.  The exception is the magnificent Russian sage plant that flowers gloriously for about six months until the lesser goldfinches eat up the remnants in the fall, and then it goes dormant in the winter.  I never prune or water it, and it's unquestionably ecstatically happy.
Thriving Russian sage, July 2019

The deodar cedar tree, which was a scrawny little thing six years ago, has grown triumphantly, also with no water.  Looking at it now, it's hard to believe I managed to use it as a Christmas tree just a few years ago.

Deodar cedar, Dec 2013
Deodar cedar, July 2019


In the backyard, getting rid of the tree of heaven was a choice I have never regretted even slightly.  The palo verde has thrived with no water, though I wish the previous owner had planted a large shade tree in that location instead.

Palo verde, Oct 2013

Palo verde, July 2019


There's a large deciduous shade tree in the far back, and although someone told me it was a Chinese elm, I haven't been able to confirm that identification.  It looks more like a weeping cherry tree, but it doesn't make any flowers.  The guy at the nursery I asked couldn't figure it out.  It makes copious leaves and branches that grow chaotically, and it needs a yearly haircut to keep it above head level.

So, anyway, I want more shade trees, and I want more shrubs that will cover up the ground and reduce the amount of scraggly grass and weeds that have to be trimmed.  Guess I'm finally going to give this gardening thing a bit of a go, hoping that with a year or two of care, I can get some new stuff established and then leave it alone.

Since the Russian sage is an obvious winner, the plan is to put them everywhere.  I'm also experimenting with a tam juniper in the front yard.  A tam juniper grows low to the ground and wide, so you can use it as a ground cover, and it's pretty!  If I can successfully not kill this, then I'll put it all over the place.  After planting four shrubs from 5-gallon pots, I must say, planting is an absolutely miserable activity.  Definitely paying the nursery or my yard crew to do it next time.  Hats off to those of you who actually like gardening.

New Russian sage (foreground) and tam juniper (right)

I want to plant some more trees in the backyard, but I need to do more research first to make sure I have the right kind of space for them when they mature. They have to not drop detritus everywhere, grow over roofs, or destroy the foundations of my garage.

Saturday, May 18, 2019

I like windows. I hate doors. A case study in door and window retrofitting.

More doors and windows, yay!  Seems like a large portion of my posts are devoted to doors and windows, so I've run out of clever and witty things to say about them.  This post is going to be a fairly dull and straightforward account of how I replaced 5 windows and a door with retrofits and added a new interior door.  However, if you read all the way to the end, I'll describe a "treasure" I found along the way.

Summary

Due to the draftiness and poor condition of several windows in my house, I replaced them with retrofits. Additionally, because the back door to the house was poorly installed and not rated for outdoor use, I replaced it at the same time, and I also installed a new door in the interior where one was missing. The windows were easy, but the doors were not.  I like windows. I hate doors.

Motivation

Most of my house has charming inward-swinging casement windows that I painstakingly restored  and weather sealed (part 1 and part 2) a few years ago.  That's holding up very well, so I'm leaving those alone.  However, the double-hung windows in the kitchen and bathroom were in poor condition and had no particular historical value.  The ropes were broken, and they were very drafty.  Additionally, the window in the laundry room off the kitchen (an enclosed former back porch) and the window in the 1990s-era add-on room were both shoddy aluminum-framed windows, apparently the cheapest possible windows available at the time.  I decided to replace these five windows.

Of course, if you're going to do windows, may as well do some doors, too!  The back door to the house was actually an interior-rated door that someone hacked a pet door into, so it was terrible for drafts and security and warped noticeably whenever it rained.  That needed to go.  Also, there was no door at all between my bedroom and the add-on office room.  I had installed a vinyl accordion door as a temporary measure, but I really wanted something permanent.

Finding a vendor/installer

Window and door retrofitting did not seem like a do-it-yourself project, so I hired an expert.  I was very happy with my choice, Redlands Door and Supply.  All the staff was very nice, professional, and responsive.  Their sales staff was knowledgeable and patient with all my questions and not pushy or sleazy, and they just felt trustworthy.  The installers were professional and courteous and did an excellent job, although the door guy did not wear safety glasses when I thought he should.

I also got a quote from another company that manufactures its own windows locally and installs them, but I didn't really like the way the windows operated, and the price wasn't any lower than the name-brand windows I ended up purchasing.  I visited another local vendor/installer in town, but I got very bad vibes from their sales staff and didn't pursue that.  But, it seemed like everyone was offering essentially the same options at the same prices anyway.

All about retrofit windows

A "retrofit window" is specifically a replacement window designed to fit within the frame of an existing window, as opposed to one installed by deconstructing the entire window frame or building an entirely new window frame.  Consequently, retrofitting windows is actually a fairly simple and straightforward procedure.  An expert measures the existing window opening, and they custom-order replacement windows from a manufacturer.  When the window arrives, they take out the moving parts of the old window but leave the frame in place. The new window comes in a pre-built frame.  They stick the entire unit into the hole, covering the existing old frame. They nail it in, seal up the gaps with expanding foam, caulk up the cracks, and then put in some new wood trim to make it look finished.  Done!
Kitchen - before
Kitchen - during
Kitchen - after

There are a handful of major window manufacturers that all sell essentially the same thing.  My impression is that there are no bad windows being sold today.  All of them are good and energy efficient because they all have to meet very specific building code standards.  They all come with double-paned, UV-coated glass, most are Energy Star rated, and they're almost all made of vinyl. The experts told me that even 10-15 years ago, there was a much wider range of windows from cheap and horrible to really good. The difference in brands nowadays has to do with how quickly the company responds to warranty repair requests, how smoothly the windows operate, and other very minor things.  I played with several types of windows in the showroom, but they were all essentially the same, and there were no bad choices.  Lacking any reasonable criteria for choosing among them, I went with Simonton because the sales guy recommended them and said they get good service from the company.

I'd been procrastinating on this project for a long time because of the cost.  However, I was pleasantly surprised that retrofit windows were actually far cheaper than I anticipated (<$500/window for the window itself and installation).  That adds up quickly when you're doing a lot, but for some reason I had been thinking thousands per window.

On installation day, the windows went really smoothly.  It took the guys about 3 hours to install all 5 windows.  The only problem was that the glass in one of them had arrived from the factory with a crack in it, so at some point Simonton will come out and replace the glass.  Other than that, it couldn't have been simpler.  I like windows!
Bathroom - before
Bathroom - after
Add-on - before
Add-on - after
Laundry room - before
Laundry room - after


All about doors

Retrofit doors seem to be the exact opposite of retrofit windows.  Most doors today are sold as "pre-hung" doors, which means that they come with a frame around them that just needs to be stuck into an existing door hole.  They also have more standard sizes.  Theoretically, this should make door retrofits easy, but this is not the case for older houses where the door holes aren't necessarily built to receive a pre-hung door frame and where sizes don't match the standards.

Additionally, unlike with windows, there seems to be endless possibilities of door styles, and as a consumer, you have to rely almost entirely on the sales guy at a door company to guide you into picking one.  They have catalogs, but the catalogs don't have prices, and then there are a million options for styles, materials, finishes, and hardware types.  You can't just get a clear picture of what all your options are and balance your desired features with the cost.  You just have to pick something and hope you didn't get ripped off.  Because there are so many choices, they don't have them in the showroom so you can't play around with them.

Also, doors are ridiculously hideously expensive for some reason.  I don't know why. One interior door and one exterior door cost as much as all five windows and took over three times as long to install.

Rotting floor under back door
So yeah, installation. The back door should have been simple because it was already a modern pre-hung door, so it should have been easy to remove the old one and put in the new one.  However, we ran into a hiccup.  The existing door was a cheap interior-rated door that should never have been put on the exterior of a house. Whoever installed it also used some interior-rated decorative trim under the door, and this trim had turned into a sponge.  The wood behind that, in the laundry room floor, was partly rotten, and it wasn't clear how bad the problem was.  To really know, you'd have to take out a bunch of floor tiles, and if it was bad enough, possibly replace part of the floor.  All before actually installing the door.

The door guy called his buddy from the shop to look at it, and then they called the boss, who arrived with the former boss (retired).  These four guys, all licensed contractors, picked and poked at it, scraped out some rotten wood, talked it over, and ultimately decided that it was probably okay to leave it as it was.  The soft, rotten part was mostly in one corner, and after scraping that out, the door guy put a hefty piece of weather-resistant material along the edge and sealed it up really well to prevent future water incursions.  Then he put a metal plate in front of it.  I hope that was the right choice, but there's no way to know until the floor falls through or something.
Before
After

I'm quite happy with the results, though.  The new back door is sturdy, and it lets in a lot of light where there previously was none.  It also gives me a view into the backyard where there previously was none.

The interior door was a total mess.  There must have been a door there at one point because there was a jamb for one, and the door guy had to remove this jamb to insert the new pre-hung door.  Removing the jamb involved removing the trim, and this got messy and complicated.  The door apparently used to be a window (which makes sense), and whoever converted it to a door had creatively sculpted the bottom part of the door frame (underneath the old window) using several pieces of glued-together scrap wood and drywall mud.  It looked very good from the outside, but it didn't come off easily, and it made lots of dust.  The door guy had to add a bunch of new wood into the wall so he'd have something solid to secure the new door to.  Then he ended up gluing a bunch of stuff together with caulk.  It was kind of terrible, and it needs a bunch of finishing work to make it look decent.  There was a little hole in the plaster wall I had to patch, but luckily I knew how to do that. Last time I dealt with an interior door, it was pretty awful, so hopefully this is the last time.  Yuuuuuuck.  I hate doors.


Wall treasure

Wall treasure
Congratulations if you've suffered all the way through this post.  Now, the promised treasure! When excavating the interior door frame, we found a treasure inside the wall: 1990s-era informational pamphlets about insulation and wall tile from HomeBase, a defunct home improvement company that closed all its stores around 2001-2002 after failing to compete with Home Depot and Lowes.  Yay!!  Isn't that exciting...

Confusingly, HomeBase is not the same thing as Homebase, which is a British chain of home improvement stores that has also struggled with bankruptcy.

I was tempted to add a secret note into the wall myself before we sealed it up again, but in all the chaos of the day, I didn't get around to it. Oh well, next time (except I promise there will never be a next time).

Friday, September 7, 2018

How I fixed my deadbolts with a pencil

Recall from my previous post about door locks that the pin tumbler locks that are standard on most doors these days use a rotating cylinder full of little pins that have to be correctly aligned by inserting the correct key.  Well, sometimes these little pins get kind of stuck because the lock gets full of grime, etc.  This makes it hard to take the key in and out of the lock.

Two of my deadbolt locks were having this problem.  The key didn't want to go in and would have to be jiggled around, and then it didn't want to come out.  Once it was in there, the lock turned just fine, though.  This is a symptom of stuck pins that need lubrication.

You can buy lock lubricant in a tube, but apparently they just use powdered graphite for this purpose.  It's nothing particularly special.  In fact, you can use a pencil "lead", which is actually made of graphite, for the same purpose.

I rubbed the tip of my pencil all over my key, put the key in the lock, and took it out again.  I repeated this a couple of times, and just like that, the problem was solved.  My key now slides in and out of both locks flawlessly.  Magic!

And now for some trivia: While pin and tumbler door locks date back at least 6000 years, wood-encased graphite pencils are much newer, dating from around 1560 in Italy.  Initially, these wood pencils were made by inserting a stick of actual graphite between two halves of a wood cylinder and gluing them together to encase the graphite stick.  Later, people discovered that you could powder the graphite, mix it with clay, and then bake it into little rods that were easier to work with.  The amount of clay could be varied to adjust the hardness of the pencil.

Sunday, August 26, 2018

My British male shower hose

My shower has a spray hose, one of those lovely handheld things that let you spray the water wherever you want it to go.  Unfortunately, the hose was starting to leak, as they do when they get old.  The internet said that some past genius had invented a standard connection size for shower hoses, so you don't have to figure out the size or anything.  You just buy any old replacement hose and screw it in.  Easy!

Of course, no house project is ever actually easy.  When I uninstalled my leaking shower hose, I found that it was not, in fact, a standard shower hose.  Standard shower hoses have female connectors, meaning that the thread are on the inside.  My hose had the threads on the outside; it was a male connector (cuz, you know, anatomy).  Guess what!  It's a boy!

I took the assembly to Home Depot to see if they had a male-to-male converter. One male end would screw into the faucet, and the other male end would screw into a standard female shower hose.  (This item is more properly called a male-to-male nipple...this entire project led to plenty of interesting internet search results.)

Home Depot didn't have anything, so I went to visit my buddies at Pro Pipe and Supply in Yucaipa, who had helped me out with a previous problem with my weird shower (which doesn't appear to have a brand name anywhere on it).  We noticed at this point that not only was the shower hose male, but the threads weren't even the same size as the standard female hoses.  The guy was pretty sure it was BSP threading, which is a British standard used commonly outside the US rather than the NPT threading used here.
Not actually British or male shower hose

So, uh, I have a British male shower hose?

Pro Pipe and Supply didn't have a converter in stock, and when they called their supplier, the part had been discontinued.  I started getting really frustrated and thought I was going to have to replace my entire faucet just because my stupid hose was leaking.

Before giving up entirely, I started searching for adapters on Amazon and thought I found two I could string together to do what I needed.  Just to be absolutely sure it would work, I removed the entire hose assembly from my shower again to measure it, and much to my surprise, something unexpected came unscrewed from the hose. An adapter!  Apparently my shower hose was an American female after all, only masquerading as a British male. (Its accent was impeccable and its costume quite convincing).  The adapter had been screwed on tightly and looked just like the hose, so I hadn't even noticed it was there.

So, problem solved with no need to order anything, and no need to have wasted multiple hours visiting plumbing stores and searching the internet for things like "male-to-male nipple".

Saturday, October 22, 2016

Insulation sandwich

My walls are now an insulation sandwich!

When I was in college and participating in the University of Chicago Scavenger Hunt, we tried to make an Earth sandwich.  You have to get two people on opposite sides of the earth to put a slice of bread on the ground, thereby creating a sandwich filled with the entire Earth.  We kind of succeeded.  Someone in Australia did one half, and someone asked someone's TA from Spain to see if one of his friends back home could do it, but the obliging friend didn't quite understand and, instead of putting the bread on the ground, sent us a photo of a slice of bread artistically arranged on the railing of some bridge in Barcelona.  I think we got points for it anyway.

But this post isn't really about sandwiches or silly things I did in college.  It's about my grown-up life and how I got my walls insulated.

A while ago when I had a not-very-helpful home energy audit, I was told that insulating the walls would probably be the most effective thing I could do to improve comfort and energy efficiency in my house (since easier things have already been done).  Since my walls already exist, the only practical way to insulate them is to cut small holes in them and blow in loose insulation material.  However, after some back-and-forth with me, the company that did the audit told me they couldn't insulate my walls because the cellulose material used for blown-in insulation has problems with moisture and mold in old houses like mine that don't have a vapor barrier to keep moisture out of the walls, as described here.

So, for a while, I wrote off the possibility of wall insulation, even though I really wanted it.  On one of our hot Southern California summer days, I could put my hand on the interior wall, and it would feel like an oven.  In the winter, it's immediately freezing again inside as soon as the heat cycles off because the cold walls just suck it right up.

One lovely 120-degree day, I started researching wall insulation again, and I found some other resources describing different materials.  The consensus seemed to be that cellulose has moisture problems, and its fire-retardant treatment breaks down after 20 years or so.  On the other hand, fiberglass, while not as environmentally friendly to manufacture, doesn't burn, isn't attractive to pests, and doesn't grow mold if it gets wet.  So, blown-in fiberglass insulation started to sound like an option.

To do blown-in wall insulation, you have to cut a small hole in the walls every 16 inches or so (between each stud), usually one high in the wall and one low if there's a horizontal beam blocking the cavity.  You use a big blower device that shoots loose material into the wall cavity until it's full, and then you patch the holes.

Since the energy audit company didn't seem to know anything about fiberglass, I had to look elsewhere for an insulation contractor.  Searching on Yelp, I was really surprised to find that there were very few in this area, none in my town at all.  I would think there would be a lot more demand for this kind of service.

I got three quotes.  Guy #1 was super professional and willing to answer all my questions patiently, and he was willing to blow the insulation in from the outside and patch the holes when he was done.  Guy #2 didn't seem to know what lath and plaster wall construction was, didn't seem to really take measurements, and kept teasing me about all the questions I was asking, so he was immediately out (Apple Valley Insulation - avoid them).  Guy #3 seemed polite and conscientious but was difficult to schedule with, and he wasn't willing to blow it in from the outside, only the inside, and he would leave the holes for me to patch myself.

I started watching some videos and decided I really didn't want to do it from the inside.  It would have been a complete mess, the kind of thing you only do if you aren't actively living in a place.  Plus, cutting into lath and plaster is always a mess because it crumbles.  Cutting into the wood siding would be much easier.  So, even though Guy #1's price was a good bit above Guy #3, it was totally worth it to have it done from the outside and to have him patch the holes for me.  So I hired Guy #1, Superior Insulation & Acoustics out of Murrieta.  I felt like I was spending a lot of money, but I calculated it out later: three guys working for a day and a half and driving over an hour to get here, plus materials...they definitely aren't getting rich off this business.  It seemed like a fair price.

They did some exploratory drilling and determined that the newer add-on in the back was already insulated, as was the ceiling in the older add-on/laundry room.  So they did the remaining exterior walls, and they very neatly cut up some foam blocks and pieced them into the weird refrigerator alcove in the laundry room which is basically just a plywood box that sticks out of the wall.  All that was left for me to do was to paint the patches!

The weather's been too nice lately to tell if the insulation has made a difference.  Perhaps I'll post again in a year's time with a before-and-after analysis of my energy usage.

They drilled lots of holes in the exterior siding
They blew it in with a hose

The walls were empty, just siding, air, and lath & plaster.

Full of insulation
Wood plug


Patched holes ready for painting