Saturday, October 23, 2021

How can you know what you want till you get what you want and you see if you like it? (living room lighting)

Stephen Sondheim's musical Into the Woods is truly delightful. It's filled with ingenious lyrics, interesting music, and rich characters. In the show, characters from various familiar fairy tales pursue their heart's desires, and by the end of the first act, they have all reached their storybook state of "happily ever after," only for it all to fall apart and come crashing down (literally) in the second act. The musical's main theme is about how everybody wants something, but as soon as they get it, they inevitably want something else.

Living room ceiling before new lighting
So I wanted to improve the lighting in my living room...

I've been living in this house for 8 years now and making do with a single fan-attached light fixture in the living room that is glary and shadowy and frustrating. The unpleasantness of this light fixture became more apparent during the pandemic when I was spending so much time at home, and I started to think about how I could improve the situation. I wanted even, ambient lighting that wouldn't be glary and cause big shadows. I wanted it to be dimmable so I could set it according to the light levels coming through the windows and the activity I was doing.

I started looking at light fixtures online, and I thought I knew what I wanted. I wanted a couple of inconspicuous flush-mounted LED lights that sit evenly with the ceiling and spread light nice and evenly. But there were tons of fixtures available, and I wasn't sure how many lumens (a measure of brightness) my fixtures should have, what color temperature they should be, and what the optimal number and spacing of the fixtures should be. And who do you even get to advise you on such a thing? An electrician? A professional lighting designer? An interior decorator?

I asked around and did some research, but I didn't have much luck. Eventually, I allowed myself to be convinced that a typical electrician could advise on this, so I started calling some to both a) get advice on the fixtures and placement and b) get a quote for installation. This did not go well. I called several electricians and never got a call back. The ones I did talk to did not seem able to give me the type of advice I really wanted. They didn't take measurements and do calculations of lumens, just eyeballed it and said "this is usually what we do." They didn't know what the word "lumen" even meant. I eventually decided I needed to just figure it out myself, and I did the best I could using an online lumen calculation tool.

I hired an electrician who actually answered his phone. He was able to squeeze in my project unexpectedly at the last minute right before starting a much larger project. He did really good work, and I was very pleased with the care he took with my crumbly old lathe-and-plaster ceilings, his thorough use of safety equipment, and the way he tidied up afterwards. He did a very, very nice job, although he did have to come back to replace the dimmer switch because something was wrong with it. The main issue was that he was always running late, which would have been annoying if I wasn't still working from home.

But all in all, the electrician did and excellent job with the installation and did exactly what I thought I wanted...but in the words of Cinderella from Into the Woods, "How can you know what you want till you get what you want and you see if you like it?" Um, right...

The new lights are glary. My ceilings aren't very high, and the light fixtures still fall within my peripheral vision if I'm sitting here working or reading or something. It's better if I wear a hat to shade my eyes. I certainly have more light than I had before, and I like them during the day time when I have them on fairly dimly to just supplement the light coming from the windows. But I'm afraid the fixtures and placement may not really have been the right choice after all.

Hmm...now that the wiring is set up, could I replace the fixtures with something that hangs down a little and reflects upwards? Or should I give up and just live with it? Blargh, I don't know.

In the words of Cinderella again, "What I want most of all is to know what I want!"

Wednesday, November 18, 2020

The Exclusion of Atticus Ratcliffe

Many weeks ago, I awoke muzzily in the early morning hours thinking I was hearing something skittering around in the attic.  However, I was half asleep, and by the time I actually got up in the morning, I wasn't sure if it was real or something I dreamed up.  It wasn't until a few weeks after that when I heard it again that I was sure.  This time, wide awake, I listened while an unknown critter skittered around in the attic and up and down the interior walls, scratching, scrabbling, and munching.  Oh goody, an attic mammal!

Luckily, I knew exactly who to call: Lowell the Mammal Guy!  Lowell specializes in wildlife removal and exclusion, particularly mammals.  He's the one I hired several years ago to extract Rigor Mortis Kitty from my crawl space (an event apparently so mundane for him that he did not remember it at all), but he also deals with live mammals. Lowell said that based on my description, my attic mammal was likely a rat.

Introducing...Atticus Ratcliffe!

Lowell, who smelled faintly of skunk, came over and meticulously examined every inch of the house exterior and attic.  He found one rat dropping in the attic but did not find evidence of a large-scale infestation, thank goodness. Seems like Atticus was just exploring or newly moved in rather than really living there. Lowell came up with a to-do list to seal off every possible entry point and came back again a few days later to complete the work with an impressive level of detail and thoroughness.  He re-screened the attic gable vents, screened off various roof vents, sealed the HVAC wire conduit thingie, improved some of the crawl space vent covers, and caulked up various cracks.  He identified Atticus Ratcliffe's likely entry point, a tiny crack where the house's two weird add-ons meet in the back. The crack seemed to lead into the crawl space and had some chew marks on it.

Lowell also set two traps for Atticus, one in the attic and one in the crawl space.  I was sincerely hoping that Atticus was outside when Lowell did his work and not trapped inside. However, Lowell had barely left when I heard Atticus crawling around in the wall near the water heater.  Darn.

Then followed about two weeks of confusion and anxiety over the fate of Atticus Ratcliffe.  I was sure I had heard him in the wall, but then the next night I heard nothing, and there was nothing in either trap the next morning. The following night, he was dancing in the attic again, but he did not go for the traps.  Lowell said rats are "neophobic", meaning that they don't like new things, so they might avoid a new trap for a while. They also often cache food, so Atticus might not be hungry enough to be interested in the bait.

After that, I heard nothing and found nothing in the traps for days and days and days. If he wasn't dancing in the attic, where was he? Had he gone outside again through some access point Lowell and I hadn't found? One night I woke up to scratching noises at 2am, but it wasn't Atticus.  It was my nocturnal neighbors cleaning their porch. Then the weather turned cold again, and Atticus was back to dancing in the attic early every morning.  Throughout this period, I was plagued by anxiety dreams, waking up in the early morning hours to every small sound, unsure whether I had heard something or dreamed it up, and dreaming about poor Atticus either slowly starving to death or me having to put him out of his misery because the trap didn't fully kill him.  Or what if Atticus wasn't even a rat?  What if he was a squirrel? 

I was on the verge of having Lowell come back to search for something we missed when I checked the crawl space trap and to my great surprise found that poor Atticus had met his demise!  Poor little bugger!  At least the trap seems to have worked correctly and killed him instantly, so hopefully he did not suffer. He was actually kind of cute, aside from the nasty long tail. He had pretty fur, cute round ears, and delicate little paws.

I felt bad for Atticus Ratcliffe.  He was just trying to make a good life for himself.  I didn't want him to die.  I just didn't want him living in my house. I would have been perfectly happy for him to go on living somewhere else...oh no, wait, I think this makes me a NIMBY!  Uh-oh. Darn. Um...

Tuesday, May 26, 2020

Window sunglasses

I've been working from home since the Coronavirus lockdown started.  This is the, um, 11th week, I think?  I've lost track. Anyway, the first month or so, it was delightfully gloomy and rainy outside, and I really enjoyed my home office setup in the living room where I could look out the window and watch the rain and the birds and the neighborhood activity.  However, once the spring rains ended and the sky returned to its usual blue and the sun returned to its usual excruciating SoCal brightness, I found that I could not keep the blinds open during the daytime without giving myself eye strain.  It was just too bright outside.  Plus, I was reminded how strongly the sun beats down on morning side of the house.

My new windows and door, since they are modern, have double panes and a UV and heat-reflecting film on them of some sort.  However, the living room still has its historically-charming original inward-swinging casement windows, which I painstakingly restored and weather sealed several years ago.  The glass, of course, is just a single pane of plain glass.  In fact, they have the historical wavy window glass that resulted from older manufacturing techniques.  They used to manufacture window glass in large cylindrical tubes which then had to be reheated, flattened, and cut to size, complete with waves, bubbles, and other imperfections.  Historical purists really love this stuff, although I'm not quite sure why.  I find it kind of charming, but although I'm mostly ambivalent about it, I would sort of rather have an unobstructed view and be able to look at birds through the window with my binoculars.  However, I'm not about to replace all the casement windows in the house anytime soon.

But, to continue working comfortably from home as the summer glare and heat increases, I needed to do something.  So, I bought some heat and UV-resistant window film that you can install on existing windows.  It's the Gila Heat Control Titanium Window Film, which I ordered from Home Depot along with an installation kit.  A lot of reviewers said they had a lot of trouble installing it, but I found the process to be very easy as long as I followed the steps shown in their how-to video and used the provided tools.  Basically you just thoroughly squirt the window and the film with their soap-like bonding chemical and then iron out the bubbles with a squeegee and trim the edges.

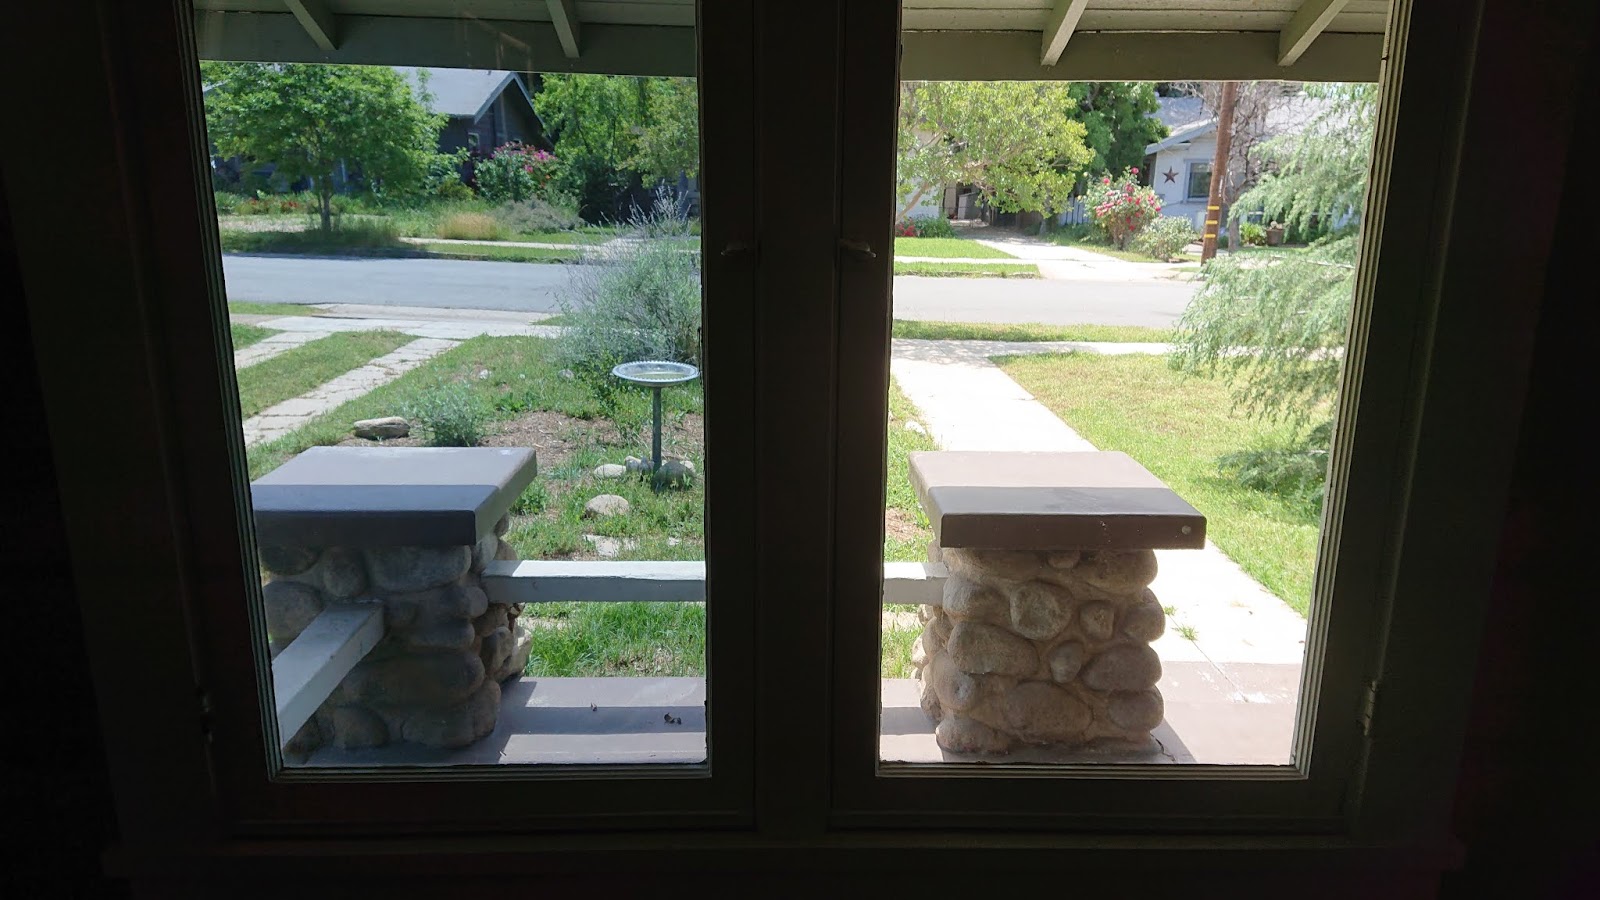
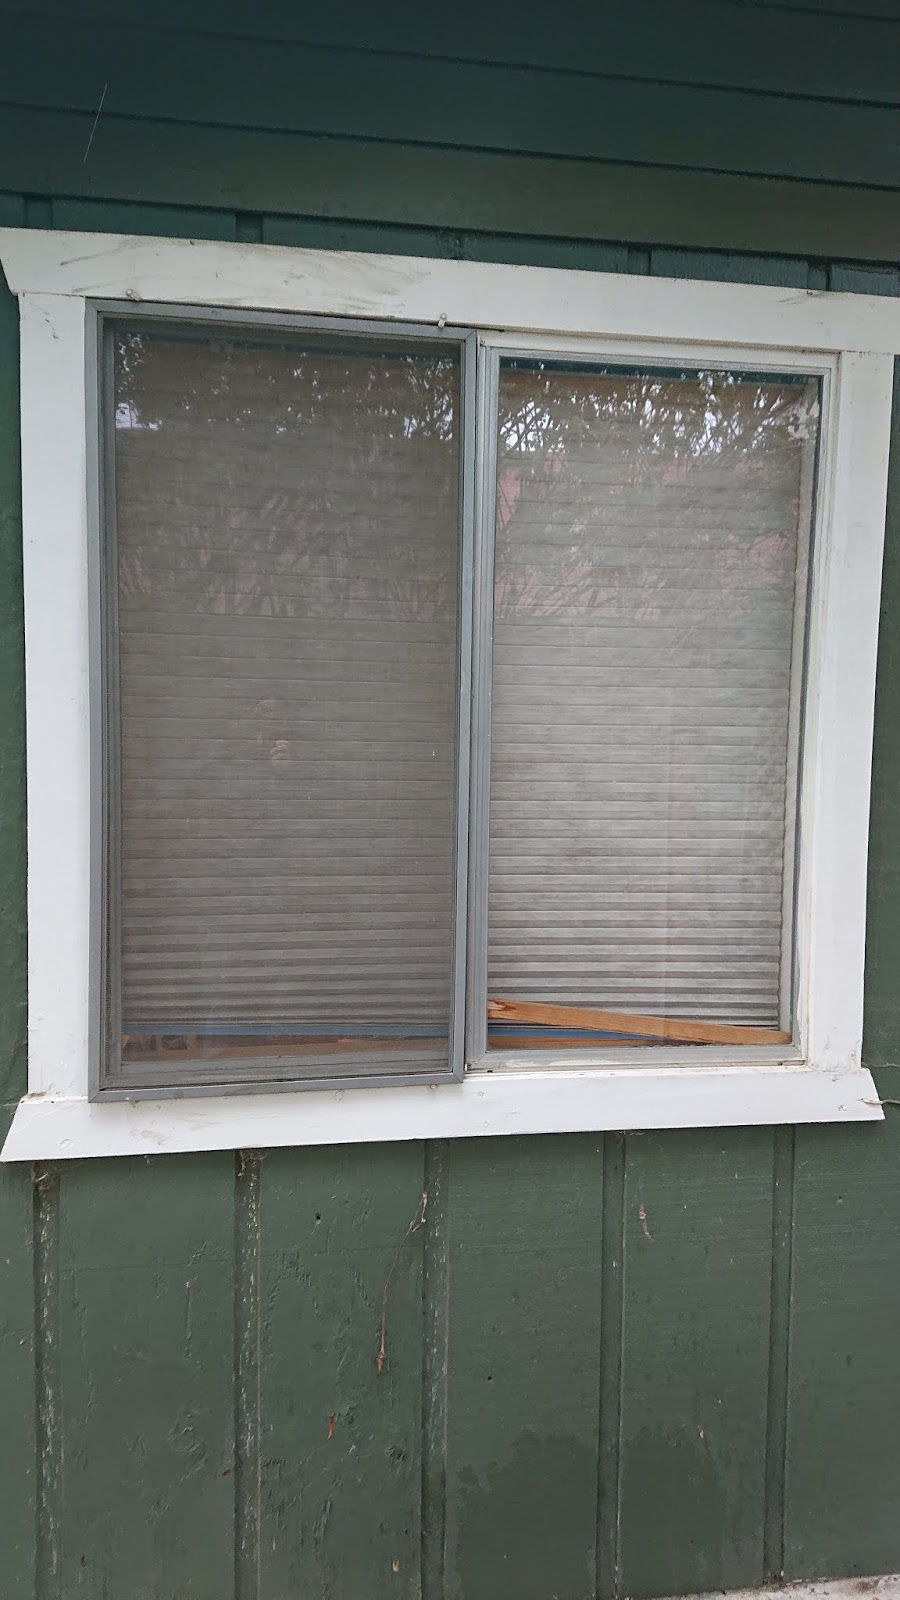
The photo below shows the front windows. The left one has the film installed, and the right one does not (yet).  You can see it makes a huge difference.  It's like having sunglasses on the window!  When the sun is actively hitting a window with the film on it, I can really tell a difference in how much heat is coming through.  And my eye strain problems are now gone.  I can keep the blinds open during the work day.


All in all, I'm quite happy with my decision here, although if I had to do it again, I think I would have picked this other Gila product that is supposedly less dark in color.  The film I chose is a bit darker and more reflective than I really wanted. In the evening or on a gloomy day, it's pretty dim.

But, I think this will work out well.  Supposedly it's removable-ish if I decide I don't like it or some future owner doesn't like it.  My boss put something like this on his windows 15 years ago, and apparently it's held up and is still very effective, so that's a good sign.

Monday, May 25, 2020

Patio/porch conversion - a Coronavirus house project

Just like most people these last few months, I've been spending a lot of time at home thanks to the Coronavirus lockdown.  Somewhat on a whim, I decided to finally embark on a bit of creative destruction that I'd been considering for a long time.  I decided to remove the dingy old screens from the porch on the back of the house.

But wait, is it a porch?  Or a patio?  Or was it a porch and now it's a patio?  According to the Oxford Dictionary of English, a porch is "a covered shelter projecting in front of the entrance to a building", but I typically think of a porch as being raised off the ground.  A patio is "a paved outdoor area adjoining a house", but I typically think of a patio as being uncovered.  It seems not to quite fit the Platonic ideals of porchness or pationess, but I'm not feeling particularly pedantic today, so let's just say it used to be a porch, and now it's a covered patio and not worry too much about it.

Here's what it looked like originally:


It wasn't awful, but it was kind of dark and dingy, and it was always dusty and full of spider webs.  We don't really have that many bugs here, and the doors had kind of fallen apart a long time ago anyway.  I never used this space for anything, and I felt like it made the house even more disconnected from the backyard than it was anyway thanks to the add-on room.  Basically the space just didn't work for me.

So, one evening I starting pulling down screens.  It came right down with no problem, and most of the non-supportive wood beams were just nailed in and came right out as well with some prodding from a claw hammer.  Some of it was a little rotten...hooray.  I only had to break out the jigsaw to make a few strategic cuts.

You can see how nicely the space now connects with the backyard!


After removing all the detritus and pulling out about a thousand staples and rusty nails, I needed to do some touch-up painting.  If you refer back to the first picture, you'll see that some previous painter suffered a fit of indecision on the right-most column, started painting it green, and then kind of gave up.  I'll probably never know why.  Other areas now had exposed wood with no paint, and there was a gross and dirty stripe on the wall where the a beam had previously covered the siding.

One curious puzzle: The house's exterior siding is a dark green color, and there's a slightly lighter green used for accents around the windows and on the underside of the roof overhang.  For some reason, a previous painter had used this lighter green for the siding inside the porch (to the right in the photo), but the adjoining siding that was on the outside of the porch (to the left in the photo) was the darker green of the rest of the house.  I wanted to repaint the ugly stripe, but the two greens didn't match.  I decided to go with the lighter green and paint over the smaller darker green area so it would match the entire wall, rather than repainting the much larger section with the wrong green.

As a result the paint colors to the left and right of the back door now do not match. Can you tell?  The neighbor child (an 8-year-old) stopped by to examine my work one day (he was being good about social distancing), and he didn't notice. Even after I explained this paint color conundrum to him and pointed it out explicitly, he still could not tell the difference between the two sides, so I guess it passes the test.  You can kind of see it in the photo here, but I bet you wouldn't notice if you hadn't been told.  (But wow, doesn't that new door look nice even a year after it was installed?)

So here's what it looks like now after removing the screens and decorative wood, repainting strategic areas, and cleaning thoroughly.  I've been doing my weekly now-virtual tap dancing class out there. (Of course, I said I didn't need the screens because we don't really have bugs, and I've now been thoroughly bitten up by mosquitoes...)


It's not 100% done.  There are still some bolts sticking out of the concrete that I cannot remove myself.  There are also some horizontal wood boards along the edge that I want to get rid of, but I dare not touch them because they go under the support beams for the roof.  I will need to hire somebody with more skill than me to either carefully cut the wood or to replace it with fresh timber because it's a little rotten.

I also want to get a comfy porch swing now that I have a place to put it.  I need to get rid of this pile of wood, too.  The neighbor cat agrees.


Tuesday, January 28, 2020

Native plants and Chinese dumps

Chinese dumps.  Yes, I'm going to talk about Chinese dumps.  But, you have to wait until the end.  I'm going to talk about native plants, first.

In the half year since I started thinking about doing something with my yard, I've learned A LOT.  The Russian sages I planted in July are thriving as expected, the tam juniper is still alive but not really doing anything, and I completely revised my strategy for gardening.

My main challenge in the past was lack of data and information.  I had no idea what plants to plant or how to care for them, and I couldn't seem to figure out how to get that information.  The local nurseries were unhelpful, and I also didn't have much luck scouting plants growing in natural areas because I couldn't identify them and didn't know enough about the care they would need or what size they would grow to.

However, over the summer, I finally hit the jackpot and found the resource I've been missing: the Inland Valley Garden Planner website from the Chino Basin Water Conservation District.  They have a database of plants well suited to growing in the Inland Empire, and, most importantly, a plant finder that allows you to filter by different characteristics, like "shrubs" or "partial shade" or "low water" or "attracts butterflies" or "California native".  There is a detailed page about each plant with information about what care it needs, how big it gets, exactly how much you should water it during each month of the year, etc.  Each plant has several photos showing what it looks like when it's mature.  This website is incredible.  It's seriously one of the best websites I've ever used.

Additionally, the Chino Basin Water Conservation District has an education center in Montclair.  It's a really amazing place!  They have a demonstration garden, a grove of trees of different sorts, and a large classroom where they teach workshops.  I attended a workshop about native plants, in which an extremely knowledgeable and enthusiastic landscape architect went through about 35 different native plants that are most likely to be successful for novice gardeners in the Inland Empire.  I talked to him afterward and asked him to answer a long list of dumb questions.  My main one was "is it crazy not to irrigate and to try to do a garden without an irrigation system?"  He said no, it's not crazy, and gave me a shortlist of plants to pick from.  This is exactly what I've been needing since forever.  Later, I attended a follow-up workshop about how to actually plant and maintain stuff, like practical gardening for dummies.

Here are the plants I decided on (all California natives):

Armed with actual data and a list of plants, I made a plan. I decided to focus on just one section of the backyard (it was too much to do the whole thing at once), the area behind the garage adjacent to the section of fence that was replaced over the summer.  That area was basically just dirt and empty space, and I decided my goal was just to take up space and cover surface area so it won't kick up dust in the summer and need mowing in the winter.

I laid out my design in ArcGIS Pro (the software I help develop at work).  I rendered some basic plant shapes in 3D using the typical mature height and width of each plant type so I could get a sense of the spacing.


Then I sourced the plants.  I noticed that there is a complete disconnect between the plants recommended by the plant finder website and the plants actually available at the local nursery.  I called several nurseries, and most of them had 0 of the 7 plant species I chose for my yard.  I asked one nursery why they don't sell those plants, and they said "We don't sell them because they don't tolerate the watering in yards with irrigation systems."  Eventually, I found 2 of my plants at Adam Hall Nursery in Moreno Valley at comparatively lower prices, and the rest I special ordered from Moosa Creek Nursery, a wholesale specialist in California native plants that delivers to Parkview Nursery in Riverside, half an hour away from me.

Not a Chinese Dump
This disconnect translates to the plants I see around town in people's yards.  I've seen almost none of my chosen plants in person, and the plants I do see in local yards aren't in the plant finder website database because they're not well suited to the environment here. Despite our climate and years of drought, people here irrigate a lot.  We have created an entirely made-up ecosystem that is only sustainable through continued irrigation, and if drought continues and population continues to increase, it seems inevitable that we'll have to change pretty much the entire ecosystem we live in within the city.

Plants finally acquired, I ordered a truckload of mulch.  Is this a Chinese dump?  No, not yet.  We'll get to that story eventually.

I hired a guy to spread the mulch and do the planting.  I had saved up a bunch of recycled newspapers to lay down under the mulch as a cheap and temporary weedcloth.  Since the weed cloth in the front yard deteriorated so quickly, I didn't think it was worth the cost and effort to get any real weed cloth.  I figure with newspaper and a layer of mulch, I should be able to go a year or two without mowing the mulched area before the weeds start to come through again, and by then my plants will be starting to take up space.  Maybe?  Hopefully.  I ended up with more mulch than I actually needed, so my guy put some in the front yard too, on top of the weeds.  Maybe it will help a little.

And, best yet, I should only need to water them weekly for the first year while they get established, and then only once a month over the summer and occasionally throughout the rest of the year if it's been dry.  No irrigation system, minimal maintenance.


So I have plants!  Doesn't look like much yet, but check back in a few years.


Now, finally, we're done with native plants, and we can talk about Chinese dumps.  Ironically, the same day I got a big load of brown and smelly mulch dumped in my driveway, my spam message queue in my work e-mail had two messages with a subject line of "Happy Chinese New Year - 75% OFF on all Dumps" from mei at chinesedumps dot com.  Teehee.  Chinese dumps.  Best spam message ever.  No, I don't know what kind of "Dumps" these messages were referring to, but I think it's better to use your imagination than to visit the website.

Update after about three months, in which we had plenty of rain:
The sages and buckwheat in particular are growing like crazy.

Thursday, January 9, 2020

Shower valves and urban water features

This is California.  We have no water.  Saving water at home is a good thing.

To save water when you take a shower, you should turn off the water when you're soaping up, and only turn it back on when you're ready to rinse.  I do this.  However, one thing that particularly annoys me and also wastes a lot of time and water is getting the water back to the correct temperature when you have to adjust two knobs.  I already did that once, and now I have to do it again!?

Shower valves to the rescue!  I got some cheap standard-sized valves on Amazon which allow me to turn the flow on and off right at the shower head, thus keeping the temperature mix correct for when I'm ready to rinse.  They only took about 5 minutes to install (one of which went onto my not-actually-British-male shower hose), and they work great!


Thinking about water flow puts me in the mind of our local urban water feature, the Mill Creek Zanja.  "Zanja", correctly pronounced "Zahn-hah", is a Spanish word meaning "ditch".  Our zanja was dug in 1819 to provide irrigation water to farms in the Redlands area long before Redlands was even Redlands and before the United States even owned California (hence why the zanja has a Spanish name).  Over the years, though, American settlers moved in, people stopped speaking Spanish here regularly, and people who didn't know better started misspelling it and saying it wrong, and it became known and the Sankey.  Some people still call it that, even though there are plenty of Spanish speakers here again who could tell you better.

Anyway, the Mill Creek Zanja cuts through the center of Redlands, and the City and some local advocacy groups have been working on developing a nice greenway along it on the east and west ends of town.  However, the zanja kind of disappears downtown.  It was covered over at some point and runs under the core downtown and dead mall, eventually reemerging next to State Street as it heads toward the Esri campus.

I was at a public meeting a while back where some planners floated the idea of diverting part of the zanja downtown and creating a linear park along it, thus connecting the greenways on both sides and creating a bike/pedestrian corridor through town.  I actually really liked the idea in principle, although it seemed to be lacking in the practicality department.  I mean, it would require a monumental amount of money and extensive care to keep it from being full of trash and to keep the landscaping actually looking nice.  Plus, it normally doesn't even have much water in it, so it would be more like a vaguely damp ditch most of the time rather than an aesthetically pleasing stream.  Finally, the existing underground channel would have to stay because the diverted portion wouldn't be able to handle the necessary capacity during flooding events, or something complicated like that. The city council apparently came to the same conclusion I did and said definitely not, so the zanja will remain covered downtown.

Cheonggyecheon stream, Seoul
I'm guessing the planners at that meeting were inspired by the famous (among planning circles) Cheonggyecheon stream restoration project in Seoul, South Korea.  The stream was very important to Seoul throughout the centuries, but after the Korean War, it became very polluted and the site of lots of homeless encampments, so they covered it over with a highway.  In the early 2000s, they removed the highway and restored the stream into a very pleasant public park.

The stream begins with a fountain and a little artificial waterfall right in the city center and then travels in a nicely-landscaped concrete channel for several miles before emptying into the Han River. Either the historic water source of the stream was always intermittent, or else it's been too disrupted by other construction (of the metro and such) to provide adequate water for the stream now, so Han River water is actually pumped to supply the stream water.  It's fantastic as a park, and it's beautiful, but its ecological value is debatable.  It's certainly not "natural", but it's also probably a lot better than a highway.

Cheonggyecheon stream, Seoul
Redlands, unfortunately, doesn't have the natural or financial resources that Seoul does, so a local zanja version of the Cheonggyecheon project is out for us.  I mean, Seoul is the center of a metropolitan area of 25 million people, and it also has a wet climate, so the stream actually has water in it.  Actually having water is a helpful characteristic for an urban water feature.

This brings us back to saving water.  I highly encourage you to get some shower valves of your own.  You can also collect your shower warm-up water in a bucket and use it to flush the toilet!  I get one free flush per shower.

Door cats. I have door cats.

Last year, I got a new back door.  I love it!  Because it has a glass panel in it, I feel so much more connected to my backyard!  I love to be able to see outside when I'm doing stuff in the kitchen.

Apparently the neighbor cats love my new door, too.  They seem to enjoy looking in as much as I enjoy looking out.  Just to be clear: these are not my cats.  I don't feed them (but yes, I pet them).


Wednesday, January 1, 2020

Bye-bye, money. Hello, new HVAC.

I have a new heating and air conditioning system!  Yay!  I have less money! Oh...

If I've learned anything as a homeowner, it's that it can be very expensive and occasionally terrifying.  Not only do you have to be prepared with cash on hand for unexpected things, but it takes courage to spend that money.  It's hard to put so much trust in a contractor or professional, and it's just scary to give up that much money all at once, particularly when you aren't sure if you're really making the right decision.

This fall, when the heating guy from Burgeson's came to do my annual tune-up, he said my furnace was on its way out.  He said something-or-other was approaching a limit where carbon monoxide could become a problem, and he showed me a picture of something with a bunch of oil leaking out which meant that something else was approaching its end.  There was also a circuit board showing symptoms of occasional overheating.  This was dismaying, but not entirely surprising.  The furnace was 15 years old, and it was low-end and very poorly installed to start with.

To be honest, I wasn't hugely disappointed, as I've always hated the heating in my house.  It would blow out like a hurricane and then immediately be cold again as soon as it turned off, and the living room was always freezing even when the other rooms were too warm.

The Burgesosn's sales guy was able to come over that same day and give me some recommendations and quotes for a new system.  He measured the house and asked me all sorts of questions about what I liked and disliked about the current system, how much I use it, what my utility bills were like, how much insulation I had in the walls, what kind of weather sealing I had on the windows, etc. (Actually, thanks to my prior insulation and weather sealing work, that meant I could go with a less enthusiastic HVAC system overall because it won't have to work as hard.)  Apparently, since the heating and air conditioning share ducting and a blower, it's typical to replace them both at the same time, so I was looking at a new AC also even though that was still working adequately.  Ugh.  So, he gave me a quote for a whole system, including replacing all the ducting to resolve some of the unevenness problems.  He also very patiently answered all my questions.

I asked him some hypotheticals about other types of heating.  Everywhere I've lived prior to this had radiators, and I find radiant heat much more even and comfortable.  Unsurprisingly, he advised that a hot-water radiator system or underfloor heating would just never make sense as a retrofit in my old house.  Another crazy idea I had: It seems like you could buy a fleet of those oil-filled electric space heater radiators, and there should be a way to network them together through your wifi and control the temperature of each room more precisely on a schedule.  I couldn't find any such networking device on the market, but mostly it just wouldn't be cost-effective.  Those things heat really nicely but consume a monumental amount of electricity.  I did run the numbers and found them to be unworkable.  So, a replacement forced-air system seemed like the only real choice.

I've been very happy with Burgeson's so far and had every reason to trust their work, but before spending that much money on something, I thought it would be good to get a second opinion.  I got a technician from another major local company to come and assess the existing system and give me a quote for a replacement. The technician saw the same stuff as the Burgeson's guy but didn't seem to think it was really a problem.  I asked him about the oil accumulating in one area that the other guy had pointed out, and this guy nonchalantly said "Oh yeah, I saw that, but these things are always oily.  I couldn't tell where it was coming from.  It probably isn't important."  He showed me photos that looked similar to the other guy's photos, so if nothing else, at least I knew that the original photos were actually photos of my system and not some scam that the Burgeson's guy shows to everybody (not that I really thought that).  The second guy said nothing about the impending carbon monoxide problem, and he was similarly lackadaisical about the burn marks on the circuit board.

He worked up a quote for me, but unlike the Burgeson's guy, he didn't really ask a lot of questions about my habits, likes and dislikes of the current system, utility bills, or insulation and weather sealing.  I guess he just assumed I wanted a comparable system of the same capacity.  I was left with very little confidence that I'd be satisfied with a new system from this company, and the price he quoted me was similar to Burgeson's.

So, that was very instructive. I was so unimpressed with the guy from the other company that I felt much better about staying with Burgeson's.  Maybe the system could have hung on another year or two, but I decided it was better to be safe than sorry and better to replace it while it was still working (and not too cold yet) than to have to do it in emergency-mode if it actually did break.  And better not to get carbon monoxide poisoning, either...  Like with my old car that went to Car Heaven last year, at some point it's just time, and it's not worth trying to squeeze more life out of something that's old and doesn't work that great.  So, I bit the bullet, and I paid an ungodly sum of money to Burgeson's for a whole new HVAC system.  Courage!

They were able to complete the installation all in one day.  They had about 6 or 8 guys running in and out of the attic all day making a lot of dust and noise, but it really went very smoothly and was less mess than it could have been.  The part I was most worried about was that they had to expand the attic access hole in order to get the old furnace out and put the new furnace in.  The only way we could figure that the original system had been put up there was that they took down a ceiling somewhere.  I can tell that the ceiling in the two bedrooms is not original, so I guess that was it.  Anyway, they opened up the attic access with no trouble, and their shop made a custom-sized metal access hole with an insulated back, no problem at all.  Also, since the attic access is in my only bathroom, I had to arrange with a neighbor to go over and use the bathroom at her house for the day, but that was okay.
Installation day. It was a busy day.
New expanded attic access hole.

The new system is MUCH better than the old one.  It's quieter, and they carefully balanced the airflow to each room, so it heats more evenly (and even came back later to tweak it when I asked them to).  It's a two-stage furnace, so when it's not super cold (which is most of the time), it runs at a lower speed and is less blowy.  I no longer have a hurricane in my kitchen.  It's never going to pay off in terms of utility bills (mine were already very low), but it's definitely already paying off in terms of comfort.  And I can now be assured that everything up there in the attic is safe and up to code (and actually officially permitted by the City).  Props to Burgeson's for doing an outstanding job!

So I think I made the right decision.  It's possible that there was more than one right decision (like waiting a year or two and then doing it), but it's impossible to know.  I definitely have less money in my bank account than I did before this project, but that's just the way it goes with home ownership.  Here's for a more comfortable and less expensive 2020!

Saturday, August 24, 2019

Unhinged and rehinged

Just about every house project ends up being more complicated than originally anticipated and takes twice as long.  However, I just completed a project where, for once, this was not the case.  In fact, it will probably take me longer to write up this quick post than it did to complete the project.

It seems like I've had a big string of recent house projects after not doing anything for a while.  I think it's because one thing leads to another.  I replaced some windows, and in doing so, triggered the need for some painting, which led to the realization that I should do some more painting.  Painting the window trim in turn led me to realize that two of my old inward-swinging casement windows had loose hinges.  These are the old windows that I painstakingly restored a few years ago, not the ones I just replaced.

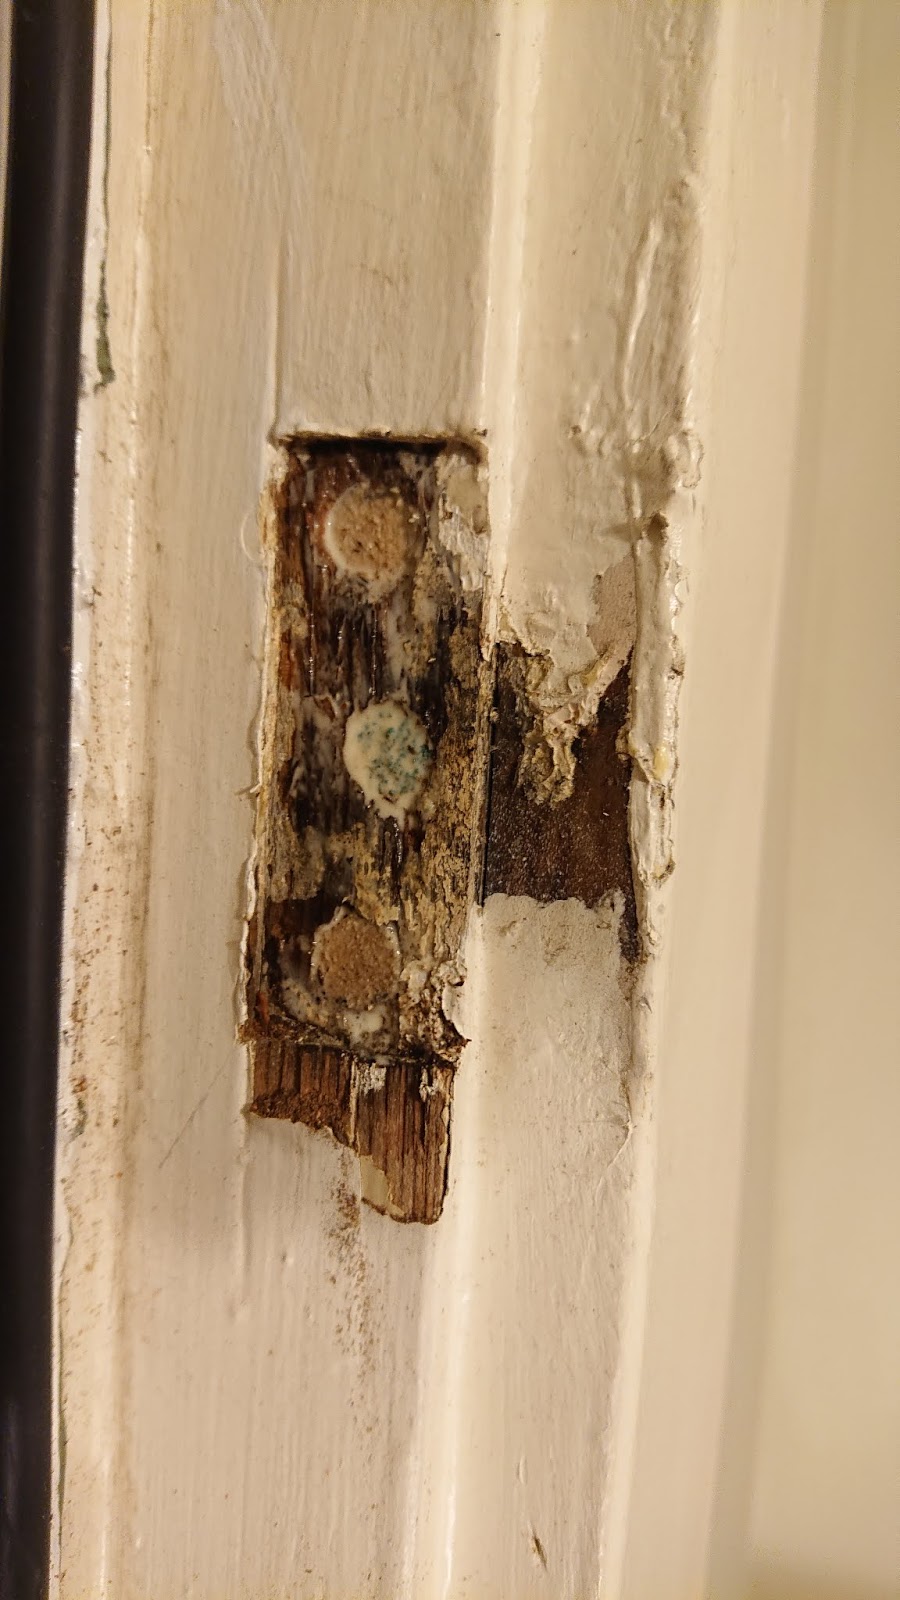
Loose hinge
It's a little frightening to pull open your window and have it almost fall out of its frame, but that's basically what happened when I opened up a few that I don't open very often so that the painter could do his work.  The hinges on these windows were coming loose from the window frames because the screws holding the hinges in place were actually stripping out the old wood.  I tried tightening the screws, but they just weren't holding.  Plus, they were old flatheads that were filled with paint and pretty hard to work with anyway.

At first, I didn't know what to do.  I thought I'd have to hire a contractor to rehang my windows, and by the time I did that, I figured it might be cost effective to just replace them entirely with modern ones.  Hooray, spending more money!  But, thanks to the internet, I discovered that this problem is actually quite easy to solve.

To fix a hinge whose screw holes have been stripped out:

  • Take the hinge off. I actually had to rip mine out (carefully) because the screws were no longer operational.
  • Drill out the existing holes to 3/8 inch.
  • Cut up a 3/8 in dowel into small pieces.
  • Cover the sides of the dowel pieces in wood glue and shove them in the holes you just drilled out.
  • Let the glue dry for a while.
  • Re-drill fresh holes into the dowels and screw your hinge back in with fresh screws.
This turned out to be super easy and worked like a charm.  My windows are now fully operational and well secured in their frames.  I kept waiting for something to go badly, but it never did.  This is possibly the easiest project I've ever done.

Oh, er, I tried to get the paint off the hardware, but now it kind of looks worse than it did.  One day I really will give everything a bath in a chemical stripper, but not today.

Dowels stuck into screw holes. Glue drying.
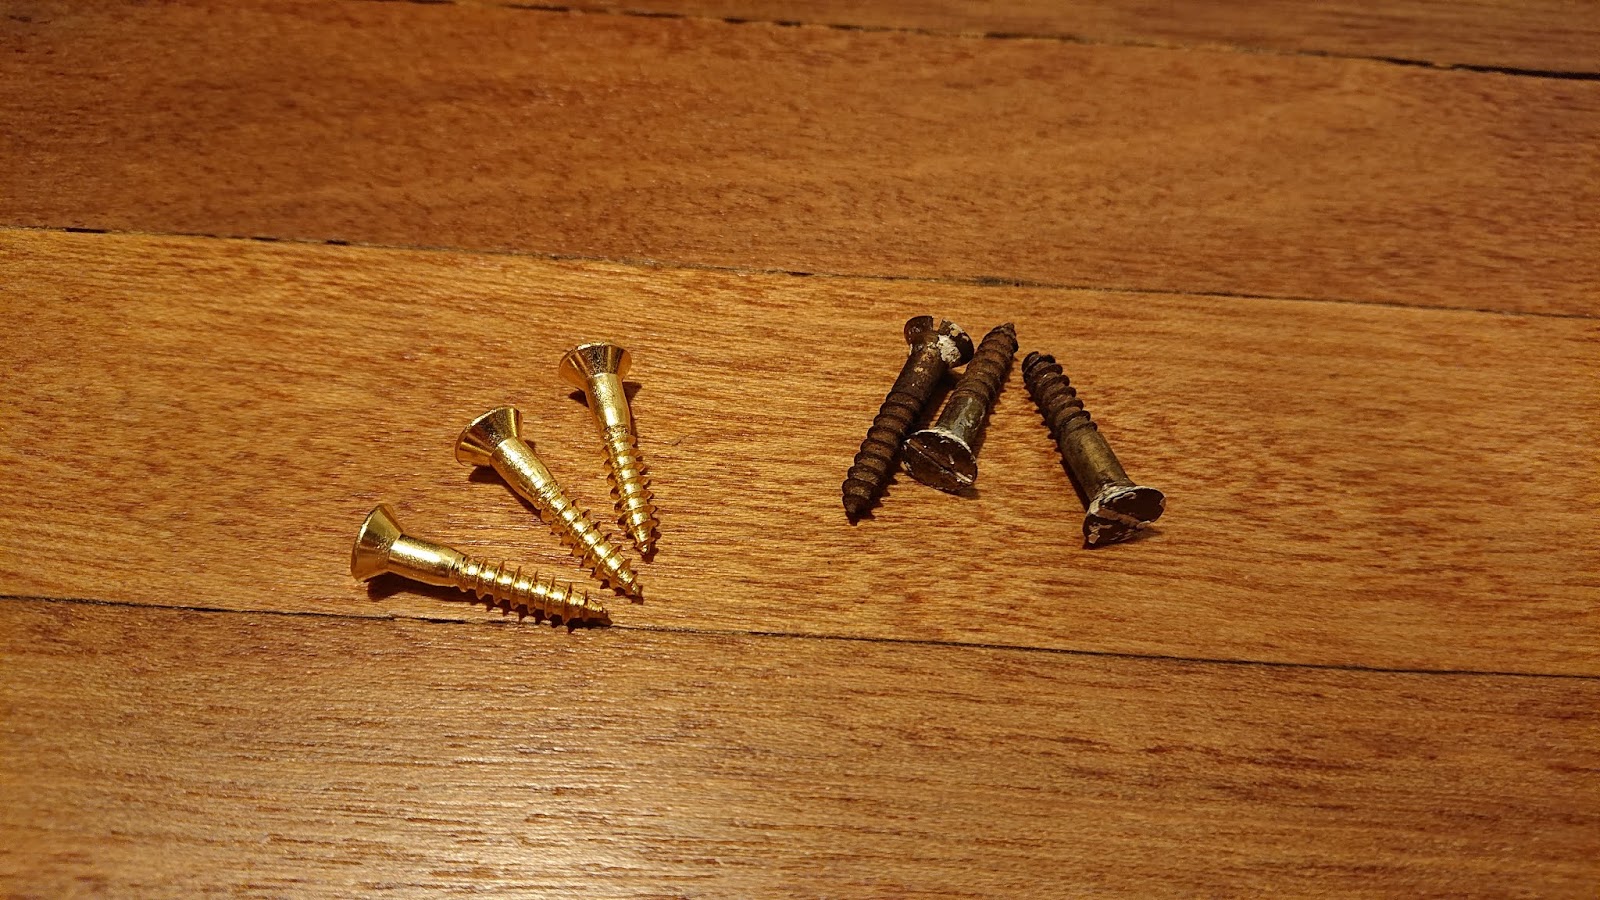
New screws were badly needed.


Hinge (sans paint) secured into the dowels with fresh screws

Friday, August 23, 2019

Painting done correctly, and redwood trees

After my disastrous experience with the shoddy painters who ghosted me, I was left with a half-finished project and too much stress.  Luckily, I found another painter to dig me out of this mess.  Julian Garza came highly recommended by a neighbor and colleague, and I spent the time to thoroughly stalk him before hiring him to strip and paint the exterior window frames on the house and all the trim on the garage.  It took him forever, but he did it the way I wanted it done (the correct way), and he did a great job. (Of course, after my experience with the other guys, I was very up front about my expectations and was watching him like a hawk.)

He used a chemical stripper to remove the paint to reduce dust and wore a respirator, long sleeves, and chemical-resistant gloves the whole time.  Big change from the other guys who just happily sanded away and breathed it all in and made no attempt to control dust at all.  Once he'd gotten as much off as he could by scraping with the chemical stripper, he used a power sander to get the remainder off and smooth down the wood.

He also primed carefully with the right kind of primer, filled holes where needed, was careful of my hardware, and even carefully preserved the screw holes for my weather stripping so I could put it back up easily.

He started at 6:30am every day and finished up by about noon on account of the heat. Totally reasonable in my opinion just for his own comfort, but also, the chemical stripper and the paints just don't work properly above a certain temperature, and it was HOT some days (110F).

This project was a ton of work, even though it was only the trim and only the garage and half the house.  I am not eager to repeat this anytime soon.  I asked him hypothetically what it would take to strip all the siding and redo it, and he said it wouldn't be worth it and that it would be better to just replace the siding...

Anyway, the end product looks great.

Bathroom window: before
Bathroom window: after


My house is made of redwood.  I knew that before this project but hadn't really given it much thought, but with all the paint stripped off, you could see the deep red color of the wood.  They built houses here of redwood because it was strong and because termites don't eat it.

Redwoods (Sequoioideae) are magnificent trees native to California. They can be among the tallest, largest (by volume), oldest, and thickest-limbed trees. Take a moment to enjoy Wikipedia's "List of superlative trees", both for the trees and for the amusement factor that the page itself exists.  Redwoods make appearances in most of the superlative lists.

Redwood trees are endangered now, and I feel bad that the builders of my house contributed to this endangerment. But, similarly to how I feel about my mahogany floors, I'm glad that the wood was put to good use in an end product that can be preserved and valued for many generations.  True, the 99 years my house has been around is very short compared to the lifespan of a redwood tree, but hopefully my house can continue as a viable living space for at least another century or so.

I'll leave you with an amusing redwood tree photo from Forest Falls in the mountains near here. This redwood tree was like "Hey, there's rocks here where I want to grow. Oh well, I don't care." and just grew over them.

Sunday, July 28, 2019

That time I got ghosted by some shoddy painters

"Ghosting" is a dating term referring to the case where one party in the relationship simply disappears with no word to the other.  They never officially break up but instead just stop answering calls and texts.  This week, I got ghosted by some shoddy painters.  Being ghosted in a romantic relationship must be extremely painful and frustrating, but actually, being ghosted by my painters was the least painful and frustrating part of this experience and probably the best outcome for me.

After my recent window and door installation, I had needed some paint touch-ups inside, and I realized that the exterior frames around the windows on the west side of the house were chipping pretty badly.  I didn't want to spend days on a ladder scraping lead paint off my window frames, so I decided to hire a painter.  I found a guy (Mark St. John from DunnRite Painting, Inc. Lic #723044) with a lead-safe certification and experience working on other old houses in this neighborhood and good reviews on Yelp.  When he came by to give me a quote, he seemed really competent and knowledgeable, and I felt good about it, so I hired him.

I waited for about 6 weeks for him to get finished with other jobs, and during that time, communication wasn't great.  I finally heard from him around 2pm on a Sunday saying they were ready to start work the following day.  I asked what time they would be arriving, and he didn't respond to my message until 7pm that evening, saying that they would be starting at 7am the next morning.  Great, thanks for the warning. <eye roll>

He arrived with his crew, went over the work to be done, and then he left, leaving just his crew to do the work.  He did not give me a written contract. I was stupid and didn't realize this or think about it until later, but actually, this probably worked in my favor in the end.

Right away, I wasn't super confident in the work the crew was doing.  They were getting dust everywhere and weren't even wearing simple dust masks (so much for lead-safe practices), they didn't take down the door I'd asked them to strip and paint but were instead just kind of scraping away at it as it was flopping around on its hinges.  They didn't strip or fully scrape off the chipping paint, and I didn't realize what was going on until they had instead filled in the cracks between the chipping paint with wood filler and then primed over it.

After they left for the day, I inspected the work more carefully and decided that I was NOT satisfied and that I needed to say something about it.  I texted the boss saying I wasn't happy and sent him some photos, asking him to come over the following morning to go over the work and discuss a solution.
They primed over still-chipping paint.

Forgot to do the side of the trim.

Used wood filler to conceal chipping paint.
All-around sloppy job on the door I asked them to strip.

My full list of complaints, which I ultimately sent to the boss later, was as follows:
  • Failure to adequately scrape or otherwise remove existing paint from surfaces, instead doing only minimal scraping and some sanding and then priming over surfaces that still had chipping paint and applying wood filler to conceal chipping paint
  • Failure to adequately control sanding dust inside the house when working outside by closing the windows or applying plastic covers to the insides of the windows when they needed to remain open
  • Failure to adequately cover floors and furniture inside when working inside
  • Failure to vacuum or adequately wipe dust from surfaces prior to painting
  • Using a shellac-based interior-rated primer on large exterior surfaces
  • Reluctance to remove door hardware prior to painting
  • Painting portions of the kitchen window trim that were not requested and without first preparing surfaces
  • Applying paint in the bathroom that was lumpy
  • Neglecting details, such as the edges of the exterior trim

This all made me very nervous because I absolutely hate having confrontations with people, and I knew this was going to be very awkward. Plus, I just felt really dumb for having made the mistake of hiring these people and not stopping them sooner in the day.  I felt that my home, my personal space, had been really violated and damaged.  So, I waited nervously all that evening and didn't get a response.  I sent an e-mail with the same photos and info as the text.  Nothing.

The next morning, nobody showed up at 7 like they said they would.  Around 8:30, one of the crew guys showed up and said he was just there to collect his stuff and that somebody else would be finishing the job.  I still had heard nothing from the boss.  I texted the boss saying that the guy had come and gone and asked what was going on.  Nothing.  Hours later, he wrote back and said "I'm not sure let me check".  Never heard from him again.

That evening, I e-mailed him to officially let him know he was fired, to give him my list of complaints (above), and to tell him that I was not going to pay him anything.  This is where it was to my advantage to not have an official contract because he would have no grounds to take me to court over this if he wanted to.

My guess is he figured that it was cheaper and easier for him to cut his losses for a day's labor and just disappear rather than come back and fix the mess the guys made. That's okay.  Good riddance.  I don't want any of his guys in my house again.

Sigh...so now I need to hire another painter to not only do the job but to also undo the damage the other guys did.  Violated and ghosted...it's been a great week.

Thursday, July 25, 2019

Might I have a bit of earth?

The Secret Garden has been one of my favorite books ever since my mom first read it to me when I was four years old.  The book is filled with vivid descriptions of the wonders of growing things and the miracle of springtime.  I would love to have a set of beautiful English walled gardens I could watch through the seasons.  Unfortunately, SoCal is not England.  Our seasons range from warm to hot, it never rains, and we don't really have a dramatic springtime.  If you were to lock up a garden and leave it alone for ten years, it wouldn't turn into a wild paradise. It would just die.  The central metaphors of The Secret Garden would have utterly failed if the garden had been here in SoCal.  Mary, Colin, and Mr. Craven would have all gotten even more miserable and then died, and Dickon would have gone off into the chaparral and started a forest fire.

When I bought my house nearly 6 years ago, I imagined turning my backyard into a wonderland of drought-tolerant shrubbery, and I imagined by the nicely xeriscaped front yard would just sit there and look nice and not get overtaken by weeds.  Neither of these things have come to pass.  I learned very quickly that I actually have no interest in gardening, and I don't really like spending time outside here because it's always hot and dry and excessively sunny.

Plus, there's a huge learning curve for an Easterner like me.  I just didn't even know where to start.  The couple of times I've gone to plant nurseries, I've been overwhelmed by choices and lack of information, and when you ask the staff what to do, they give you 500 options and don't seem to really know what they're talking about.  I just wanted someone to point and like three different things and say "plant this".

Also, most of the stuff I see in nurseries seems geared toward people who have irrigation systems of some sort in place, either traditional sprinklers for grass or drip irrigation for more drought tolerant stuff.  I don't want to garden like that.  I want to get it established and then leave it alone.  When I say this to the nursery staff, they look at me like I'm an idiot.  Maybe I am.  But, I do see trees and shrubs around in locations where they're clearly not being watered, so I don't know why then nurseries aren't just selling that stuff.  Or maybe it's in there, but I don't know how to find it, and the staff doesn't know how to guide me to it.  Maybe in the future, I should just go for a drive or a hike and take pictures of all the stuff I see growing with no water and then try to figure out what it is and plant that stuff.

Anyway, thinking somewhat along those lines, six years is enough time to observe the growth patterns of what's already in the yard and to determine what will thrive and what will die.  In the xeriscaped front yard, patchy grass and other weeds grew back up through the weed cloth and decomposed granite.  Most of the shrubs died or just failed to thrive.  The exception is the magnificent Russian sage plant that flowers gloriously for about six months until the lesser goldfinches eat up the remnants in the fall, and then it goes dormant in the winter.  I never prune or water it, and it's unquestionably ecstatically happy.
Thriving Russian sage, July 2019

The deodar cedar tree, which was a scrawny little thing six years ago, has grown triumphantly, also with no water.  Looking at it now, it's hard to believe I managed to use it as a Christmas tree just a few years ago.

Deodar cedar, Dec 2013
Deodar cedar, July 2019


In the backyard, getting rid of the tree of heaven was a choice I have never regretted even slightly.  The palo verde has thrived with no water, though I wish the previous owner had planted a large shade tree in that location instead.

Palo verde, Oct 2013

Palo verde, July 2019


There's a large deciduous shade tree in the far back, and although someone told me it was a Chinese elm, I haven't been able to confirm that identification.  It looks more like a weeping cherry tree, but it doesn't make any flowers.  The guy at the nursery I asked couldn't figure it out.  It makes copious leaves and branches that grow chaotically, and it needs a yearly haircut to keep it above head level.

So, anyway, I want more shade trees, and I want more shrubs that will cover up the ground and reduce the amount of scraggly grass and weeds that have to be trimmed.  Guess I'm finally going to give this gardening thing a bit of a go, hoping that with a year or two of care, I can get some new stuff established and then leave it alone.

Since the Russian sage is an obvious winner, the plan is to put them everywhere.  I'm also experimenting with a tam juniper in the front yard.  A tam juniper grows low to the ground and wide, so you can use it as a ground cover, and it's pretty!  If I can successfully not kill this, then I'll put it all over the place.  After planting four shrubs from 5-gallon pots, I must say, planting is an absolutely miserable activity.  Definitely paying the nursery or my yard crew to do it next time.  Hats off to those of you who actually like gardening.

New Russian sage (foreground) and tam juniper (right)

I want to plant some more trees in the backyard, but I need to do more research first to make sure I have the right kind of space for them when they mature. They have to not drop detritus everywhere, grow over roofs, or destroy the foundations of my garage.

Saturday, May 18, 2019

I like windows. I hate doors. A case study in door and window retrofitting.

More doors and windows, yay!  Seems like a large portion of my posts are devoted to doors and windows, so I've run out of clever and witty things to say about them.  This post is going to be a fairly dull and straightforward account of how I replaced 5 windows and a door with retrofits and added a new interior door.  However, if you read all the way to the end, I'll describe a "treasure" I found along the way.

Summary

Due to the draftiness and poor condition of several windows in my house, I replaced them with retrofits. Additionally, because the back door to the house was poorly installed and not rated for outdoor use, I replaced it at the same time, and I also installed a new door in the interior where one was missing. The windows were easy, but the doors were not.  I like windows. I hate doors.

Motivation

Most of my house has charming inward-swinging casement windows that I painstakingly restored  and weather sealed (part 1 and part 2) a few years ago.  That's holding up very well, so I'm leaving those alone.  However, the double-hung windows in the kitchen and bathroom were in poor condition and had no particular historical value.  The ropes were broken, and they were very drafty.  Additionally, the window in the laundry room off the kitchen (an enclosed former back porch) and the window in the 1990s-era add-on room were both shoddy aluminum-framed windows, apparently the cheapest possible windows available at the time.  I decided to replace these five windows.

Of course, if you're going to do windows, may as well do some doors, too!  The back door to the house was actually an interior-rated door that someone hacked a pet door into, so it was terrible for drafts and security and warped noticeably whenever it rained.  That needed to go.  Also, there was no door at all between my bedroom and the add-on office room.  I had installed a vinyl accordion door as a temporary measure, but I really wanted something permanent.

Finding a vendor/installer

Window and door retrofitting did not seem like a do-it-yourself project, so I hired an expert.  I was very happy with my choice, Redlands Door and Supply.  All the staff was very nice, professional, and responsive.  Their sales staff was knowledgeable and patient with all my questions and not pushy or sleazy, and they just felt trustworthy.  The installers were professional and courteous and did an excellent job, although the door guy did not wear safety glasses when I thought he should.

I also got a quote from another company that manufactures its own windows locally and installs them, but I didn't really like the way the windows operated, and the price wasn't any lower than the name-brand windows I ended up purchasing.  I visited another local vendor/installer in town, but I got very bad vibes from their sales staff and didn't pursue that.  But, it seemed like everyone was offering essentially the same options at the same prices anyway.

All about retrofit windows

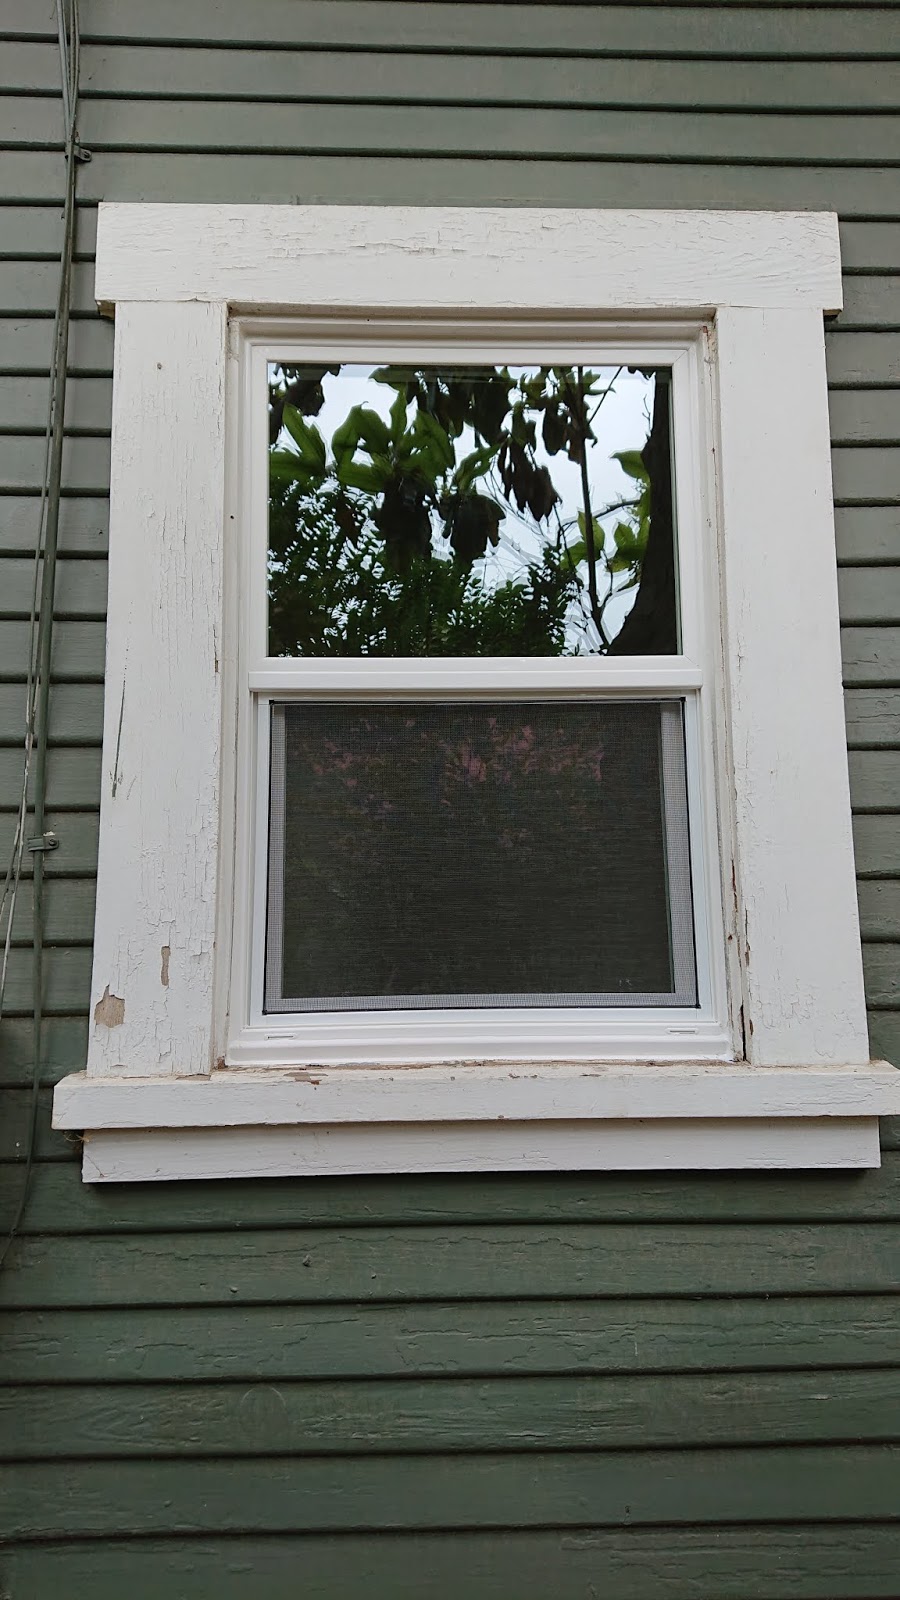
A "retrofit window" is specifically a replacement window designed to fit within the frame of an existing window, as opposed to one installed by deconstructing the entire window frame or building an entirely new window frame.  Consequently, retrofitting windows is actually a fairly simple and straightforward procedure.  An expert measures the existing window opening, and they custom-order replacement windows from a manufacturer.  When the window arrives, they take out the moving parts of the old window but leave the frame in place. The new window comes in a pre-built frame.  They stick the entire unit into the hole, covering the existing old frame. They nail it in, seal up the gaps with expanding foam, caulk up the cracks, and then put in some new wood trim to make it look finished.  Done!
Kitchen - before
Kitchen - during
Kitchen - after

There are a handful of major window manufacturers that all sell essentially the same thing.  My impression is that there are no bad windows being sold today.  All of them are good and energy efficient because they all have to meet very specific building code standards.  They all come with double-paned, UV-coated glass, most are Energy Star rated, and they're almost all made of vinyl. The experts told me that even 10-15 years ago, there was a much wider range of windows from cheap and horrible to really good. The difference in brands nowadays has to do with how quickly the company responds to warranty repair requests, how smoothly the windows operate, and other very minor things.  I played with several types of windows in the showroom, but they were all essentially the same, and there were no bad choices.  Lacking any reasonable criteria for choosing among them, I went with Simonton because the sales guy recommended them and said they get good service from the company.

I'd been procrastinating on this project for a long time because of the cost.  However, I was pleasantly surprised that retrofit windows were actually far cheaper than I anticipated (<$500/window for the window itself and installation).  That adds up quickly when you're doing a lot, but for some reason I had been thinking thousands per window.

On installation day, the windows went really smoothly.  It took the guys about 3 hours to install all 5 windows.  The only problem was that the glass in one of them had arrived from the factory with a crack in it, so at some point Simonton will come out and replace the glass.  Other than that, it couldn't have been simpler.  I like windows!
Bathroom - before
Bathroom - after
Add-on - before
Add-on - after
Laundry room - before
Laundry room - after


All about doors

Retrofit doors seem to be the exact opposite of retrofit windows.  Most doors today are sold as "pre-hung" doors, which means that they come with a frame around them that just needs to be stuck into an existing door hole.  They also have more standard sizes.  Theoretically, this should make door retrofits easy, but this is not the case for older houses where the door holes aren't necessarily built to receive a pre-hung door frame and where sizes don't match the standards.

Additionally, unlike with windows, there seems to be endless possibilities of door styles, and as a consumer, you have to rely almost entirely on the sales guy at a door company to guide you into picking one.  They have catalogs, but the catalogs don't have prices, and then there are a million options for styles, materials, finishes, and hardware types.  You can't just get a clear picture of what all your options are and balance your desired features with the cost.  You just have to pick something and hope you didn't get ripped off.  Because there are so many choices, they don't have them in the showroom so you can't play around with them.

Also, doors are ridiculously hideously expensive for some reason.  I don't know why. One interior door and one exterior door cost as much as all five windows and took over three times as long to install.

Rotting floor under back door
So yeah, installation. The back door should have been simple because it was already a modern pre-hung door, so it should have been easy to remove the old one and put in the new one.  However, we ran into a hiccup.  The existing door was a cheap interior-rated door that should never have been put on the exterior of a house. Whoever installed it also used some interior-rated decorative trim under the door, and this trim had turned into a sponge.  The wood behind that, in the laundry room floor, was partly rotten, and it wasn't clear how bad the problem was.  To really know, you'd have to take out a bunch of floor tiles, and if it was bad enough, possibly replace part of the floor.  All before actually installing the door.

The door guy called his buddy from the shop to look at it, and then they called the boss, who arrived with the former boss (retired).  These four guys, all licensed contractors, picked and poked at it, scraped out some rotten wood, talked it over, and ultimately decided that it was probably okay to leave it as it was.  The soft, rotten part was mostly in one corner, and after scraping that out, the door guy put a hefty piece of weather-resistant material along the edge and sealed it up really well to prevent future water incursions.  Then he put a metal plate in front of it.  I hope that was the right choice, but there's no way to know until the floor falls through or something.
Before
After

I'm quite happy with the results, though.  The new back door is sturdy, and it lets in a lot of light where there previously was none.  It also gives me a view into the backyard where there previously was none.

The interior door was a total mess.  There must have been a door there at one point because there was a jamb for one, and the door guy had to remove this jamb to insert the new pre-hung door.  Removing the jamb involved removing the trim, and this got messy and complicated.  The door apparently used to be a window (which makes sense), and whoever converted it to a door had creatively sculpted the bottom part of the door frame (underneath the old window) using several pieces of glued-together scrap wood and drywall mud.  It looked very good from the outside, but it didn't come off easily, and it made lots of dust.  The door guy had to add a bunch of new wood into the wall so he'd have something solid to secure the new door to.  Then he ended up gluing a bunch of stuff together with caulk.  It was kind of terrible, and it needs a bunch of finishing work to make it look decent.  There was a little hole in the plaster wall I had to patch, but luckily I knew how to do thatLast time I dealt with an interior door, it was pretty awful, so hopefully this is the last time.  Yuuuuuuck.  I hate doors.


Wall treasure

Wall treasure
Congratulations if you've suffered all the way through this post.  Now, the promised treasure! When excavating the interior door frame, we found a treasure inside the wall: 1990s-era informational pamphlets about insulation and wall tile from HomeBase, a defunct home improvement company that closed all its stores around 2001-2002 after failing to compete with Home Depot and Lowes.  Yay!!  Isn't that exciting...

Confusingly, HomeBase is not the same thing as Homebase, which is a British chain of home improvement stores that has also struggled with bankruptcy.

I was tempted to add a secret note into the wall myself before we sealed it up again, but in all the chaos of the day, I didn't get around to it. Oh well, next time (except I promise there will never be a next time).